Showing posts with label Favorite Things. Show all posts

August 9, 2017

Needle Felted Frannie

Instagram is a great place to discover insanely talented artists. I'm not sure how I first found Dani Ives a.k.a. @begoodnatured, but her felted wool artwork is incredible. From dogs and cats to mice, toadstools, and even slices of pizza, Dani creates the most realistic portraits with only wool fibers and felting needles. If you're not on Instagram, you can check out her work and watch time-lapse videos of her pieces coming together here.

In celebration of National Pet Day back in April, Dani posted an auction and a giveaway. For the giveaway, she asked people to share about the pet they would like a portrait of. I had a little free time and wrote about my cat, Jack, who I had for around 12 years and said goodbye to in 2014. It turns out that I WAS THE RANDOM GIVEAWAY WINNER! I couldn't believe it - what a great prize to win! I communicated with Dani and tried to find a good photo of Jack for her to use as a reference for the portrait, but I just didn't have any that would have worked. So I asked her if I could use my current cat, Frannie, instead. I had the perfect picture:


We agreed that Frannie would be a good subject, and after a lot of agonizing, I chose a coral-colored wool felt background. Dani shared a few peeks of her process on Instagram, and I saved screenshots because I was so excited to see the progress. She always starts with the eyes and nose and then works outward.


The portrait finally arrived, and after admiring Dani's thoughtful packaging, I was floored when I saw the portrait up close. The level of detail is incredible, down to the reflection in Frannie's eyes and the little hairs in her ears.


Dani captured Frannie's personality so well -- she looks so serious (and maybe a little judgy?) but really she's just intent on getting your attention and compelling you to give her a good head rub or throw a toy for her to chase. This portrait was such a surprise to win, and I feel so lucky to have a piece of Dani's artwork in my home.

September 1, 2015

New Favorite Reversible Tote


When a project catches my eye, it tends to stay with me. This tote from Very Shannon has been rattling around in my mind since January, I think, when it showed up in my daily tutorial email from Sew Can She (http://www.sewcanshe.com/). I printed off the instructions and the pattern pieces and then forgot about them as I packed up all my sewing supplies and moved to Tennessee. A few months later, I rediscovered the pattern and decided to attempt a tote for myself - the green and white striped one. I was so happy with the results that I made another for my friend Jessica's birthday (the gray floral), and then I bought a bunch of fabric with which to make more. Get ready for a tote-filled Christmas, friends and family!


The only real challenge I had with this pattern is that when you use the same pattern to cut the exterior and interior fabrics, the interior ends up being too large. So when you tuck one into the other and then topstitch around the open edges, you'll likely have to fiddle with the raw edge of the interior piece and tuck it into the seam allowance quite a bit in order to make it fit.


The other change I made was to line both pieces (interior and exterior) with a lightweight fusible interfacing. The pattern calls for a mid-weight interfacing on only the exterior, but I had trouble with interfacing that wouldn't fuse and a lining that was kind of droopy. Fusing lightweight interfacing to both sides makes the final tote look crisper and cleaner, and it also holds its shape better when I set it down. For the totes shown here, the first one in green and white is double interfaced; the floral and green tote has interfacing on only the floral piece.


And here's one last tote I'm making for myself before I buckle down and start sewing them up for Christmas gifts.


June 8, 2015

Couscous Salad with Chickpeas


This easy recipe for Couscous Salad with Chickpeas is one of my absolute favorites. I discovered it a few years ago and have made it many times for office pitch-in lunches and parties with friends. It's best made the day ahead so that the flavors can marry, and it gets better and better as a leftover. I recently pulled it out when my mom was looking for something to make for a weekend getaway with her friends, and as I was digging into the leftovers, I thought, "This is so good. I should share it on the blog." So here you go.

Source: Cooking Light, http://www.myrecipes.com/recipe/couscous-salad-with-chickpeas

Couscous Salad with Chickpeas

Yield: 4 servings (serving size 1 1/3 cups)
Total time: 20 minutes

Ingredients
1 cup uncooked whole-wheat couscous
1/2 teaspoon salt, divided
1/2 teaspoon black pepper, divided
1/8 teaspoon ground cinnamon
1 cup boiling water
3 tablespoons extra-virgin olive oil
3 tablespoons fresh lemon juice (typically 1 large lemon)
1 1/2 teaspoons minced garlic
Dash of sugar
1/3 cup chopped fresh mint (I consider this optional)
1/4 cup thinly sliced green onions
1/8 teaspoon smoked paprika
One 15-ounce can chickpeas (aka garbanzo beans), rinsed and drained
1 large ripe tomato, chopped (can substitute chopped grape or cherry tomatoes)
2/3 cup (3 ounces) crumbled feta cheese

Instructions
  1. Place couscous, 1/4 teaspoon salt, 1/4 teaspoon pepper, and cinnamon in a bowl. Stir in boiling water, cover, and let stand 10 minutes. Fluff with a fork.
  2. In a small bowl, combine olive oil, lemon juice, garlic, and sugar. Add to couscous and stir to combine.
  3. Stir in remaining 1/4 teaspoon salt, 1/4 teaspoon pepper, mint, onions, paprika, chickpeas, tomato, and feta.
Tip: Make a day ahead for best flavor.

December 5, 2013

My New Favorite Thing: A Favorite Things Exchange


Recently I posted instructions for a 5-minute infinity scarf that I whipped up for a "Favorite Things" party, but I realized that this type of party was new to me so it may also be new to you. Here's the rundown on one of the best party ideas ever.

Ingredients for a Favorite Things Exchange:

1. A hostess (or hostesses) willing to have a clean house and set up everything.
2. Snacks and drinks, either provided by the hostess or brought by guests to share
3. Loot bags*
4. Vase or bowl to pull names from, pens, and paper*
5. Door prizes*
6. Party guests: In my opinion, the guest list should be limited to 12 or fewer.
* responsibility of the hostess

Steps for a Favorite Things Exchange:

1. Send out invites. This is a great mixer for people who don't know one another. Our hostess had old friends and new friends and neighbors all mixed together, and it was great!


Suggestion for wording your invite:
Think of something you love that costs under $10, and bring 3 of that item to the party. We will draw names and everyone will go home with 3 amazing new finds.
 
Now, you can decide to do 6 things under $5 or whatever combo that might be interesting (maybe 10 items under a $1) -- just do whatever sounds fun and appropriate for your group.

2. If you're a hostess, you'll need to supply loot bags for guests to take home their collected gifties.


3. You'll also need a stack of scrap paper for people to write their names down and a vase or bowl to collect them in. If your exchange involves 3 items from each person, then each name is written on 3 slips of paper. If you're doing 6 items, then names go on 6 slips of paper to ensure everyone goes home with the right number of gifts.


4. No party is complete without food and drink. Our hostesses put out quite a spread. Appetizers are perfect for this kind of party because you can try a little of everything and not feel stuffed at the end of the night.


5. Now for the Favorite Thing portion of the evening. Each guest stands in front of the group and shares why their favorite thing is their favorite thing.  Then that guest draws 3 names (or 6 or however many gifts you're distributing), and those 3 people get to take home that particular favorite thing. I shared that my sister Elizabeth had made me an infinity scarf that I wore when traveling internationally. I loved it because it was soft and it kept me cozy on drafty planes.  Then I drew 3 names and passed out scarves to those 3 guests.

Here are a few of the favorite things from our party. I ended up taking home the eye makeup remover and hair corkscrew, an EOS lip balm, and a pack of basil-scented Meyer cleaners for the kitchen (which I LOVE).

The best eye makeup remover and hair corkscrew
The best dry shampoo and Sharpie brushes
A favorite Essie nail polish and foundation base
A wire angel from a favorite store
"Party in your mouth" toothpaste and a cute cosmetics bag
The best thing post-pedicure to keep your feet soft

The best thing to end a cold day
The 5-minute infinity scarf (instructions here)
6. After everyone has presented and given out their favorite things, throw all the names back into the bowl and draw for door prizes. I won a December "Favorite Things" issue of Oprah's O magazine, and another guest won a picture frame from the hostess's favorite craft store.  We also went home with mini-pies from a pie shop that just opened in town. Any party that ends with a pie is alright with me!

I would love to hear about similar Favorite Thing parties. Please share and check out our Pinterest board we're building for Favorite Thing gift ideas!

April 17, 2013

Birthday Cupcakes for a Yarn Enthusiast

My dear friend was nice enough to surprise me with these amazingly decorated cupcakes for my birthday last month.  It's yarn!  In frosting!  On cupcakes!  With chocolate needles!


The design/instructions are from the book What's New, Cupcake?. You've probably seen the book, or the first one by the same authors, Hello, Cupcake! It's one thing to admire the designs and think, "Some day, I'll give those a try," knowing full well that you're being optimistic and those gorgeous cupcakes will never materialize. It's another thing entirely to create them -- and do such a great job of it! (Oh, and that's while knowing that you won't be eating said cupcakes because you're in the throes of gestational diabetes. My poor, selfless friend.)

These were a great birthday surprise, and they were almost too pretty to eat.  Almost.

February 2, 2013

Big Finish: Chenille Blanket for Baby

 
Last summer I bought this paisley cotton twill and three colors of coordinating flannel solids at my local Hancock Fabrics with the intention of making the Heirloom Cut Chenille Baby Blanket from Aesthetic Nest.  The stack of fabric sat around my sewing room for a while as I worked on other projects.  Then I found out that a friend and fellow quilter was expecting her first baby, and when Baby was revealed to be a girl, I decided to finally make the blanket and give it as a baby gift. 

Chenille Blanket
 
Chenille Blanket

The lesson I learned with this particular type of blanket is that the flannel on the top of the stack is the one that you will see the most of after it frays and crinkles up in the wash.  I used red, yellow, and orange in that order from bottom to top, so the finished look is very orange.  I probably would have changed that and put the yellow on top for a softer look, and it's a lesson learned for next time.

Chenille Blanket

The tutorial uses satin blanket binding and mentions double fold bias tape as another option.  I bought premade bias tape but found that the fabric was too sheer and the paisley print showed through.  So instead I pulled this Joel Dewberry stripe from my stash and made my own bias binding instead.  The process of creating bias binding is definitely not my favorite, but the results are worth it, and I'm glad I went this route.

Striped Bias Binding

This blanket was a big hit.  My friend seemed to really like it, and other gals at the baby shower were asking how I'd done it and wanting to see it up close.  The chenille gives it a nice weight and cushion, so it's suitable for use as a warm blanket or for playtime on the floor.  My friend welcomed her baby just a couple of days ago, and I look forward to seeing her on this bright, colorful blanket.

Here's the cotton twill and flannels I'll be using on my next go-around:

September 7, 2012

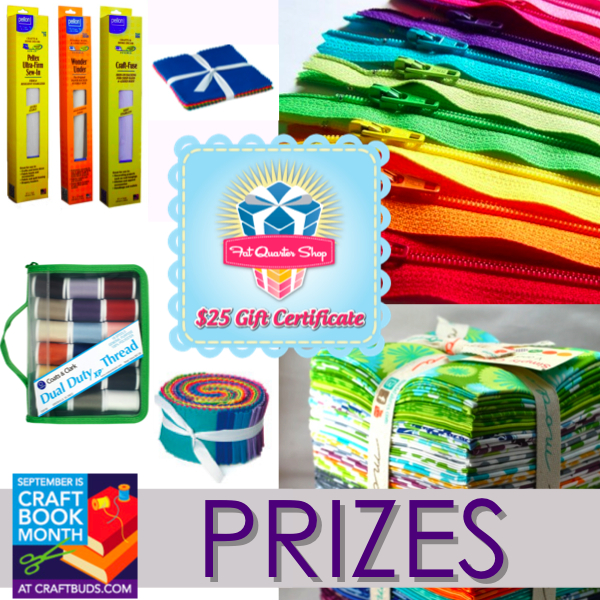
Giveaway: Craft Buds' Craft Book Month Blog Hop and FreeSpirit Friday


Hi everyone!  Coming up on Sept 17, Inspire Me Grey will be participating in a month-long craft book blog hop hosted by the lovely folks at Craft Buds.  Today is the end of the first week of the hop, and it's also FreeSpirit Friday, which means you can enter to win loads of great solid fabric from FreeSpirit.  Visit the Week in Review at Craft Buds for a review and giveaway.

Back-to-school season means its time to hit the books. Craft books, that is! We love craft books for their inspiration, stunning photography and crisp, glossy pages. Hard covers or soft, we just love craft books, and we know you do, too!

All month long in September, our friends at Craft Buds will celebrate sewing, quilting and all kinds of craft books by shining the spotlight on new releases, interviewing authors and editors who make the magic happen and giving you a chance to win.


Blog Hop

Week One
Sunday 9/2: Hopeful Threads / The Jolly Jabber

Monday 9/3: Stitchery Dickory DockMe Sew Crazy

Tuesday 9/4: Olive & OllieSew Sweetness

Wednesday 9/5: Fabric SeedsThe Busy Bean

Thursday 9/6: CraftFoxesStitched In Color

Friday 9/7: Katie's KornerA Prairie Sunrise

Week Two
Sunday 9/9: Sweet Diesel Designsmissknitta's studio

Monday 9/10: Sew TaraClover and Violet

Tuesday 9/11: Sew Fantasticamylouwho

Wednesday 9/12: Projektownia JednoiglecTwo More Seconds

Thursday 9/13: Ellison Lane QuiltsDon't Call Me Betsy


Friday 9/14: Live a Colorful LifeLRstitched

Week Three
Sunday 9/16: Fairy Face DesignsCanoe Ridge Creations

Monday 9/17: Inspire Me GreyFreshly Pieced


Tuesday 9/18: Lindsay SewsThe Cute Life

Wednesday 9/19: The Littlest ThistleSew Crafty Jess

Thursday 9/20: Urban Stitchesimagine gnats

Friday 9/21: Sew Bittersweet DesignsThe Plaid Scottie

Week Four
Link up your craft book project at Craft Buds from Sept 23-30 from your blog or Flickr account, and enter to win prizes. Winners will be announced on Monday, October, 1!


To participate in the month-long contest, just link up any project you've made from a pattern in a craft book. That easy! You'll tell us a little about the book, the project, how you personalized it, etc.
Rules:
1) One entry per person.
2) Your craft book project must have been completed in 2012.
3) Create a new blog post or Flickr photo (dated September 1, 2012 or later) and link back to Craft Buds/Craft Book Month in your post or photo description.

No time to create a project? This month, just follow Craft Buds and comment to win some new craft books and lots of giveaways! We'll also have expert Q-and-As to show you what it takes to write a craft book, from the initial idea to the layout, photography and the actual printed product.


May 13, 2012

Crazy for Drawstring Bags

Drawstring bags


Can you tell I'm a big fan of this drawstring bag pattern from Jeni Baker of In Color Order?  The pattern includes 8 sizes as well as instructions for creating bags in any custom size.  They're so easy and fast to make, and they're a fun way to personalize gift wrapping while featuring favorite fabrics.  I've starting making the Everything Bag size to go with my felt memory games (pictured above), and the slightly larger Project Bag size is perfect for knitting and crochet projects, as Jen and our mom can confirm.
If you're looking for a simple sewing project to play around with, download this pattern and just try to stop at one bag -- I couldn't!

April 25, 2012

Kindle Cover and a Guest Post at Craft Buds

Kindle cover
open (snug as a bug in a rug)
Hi there! I'm guest posting today at Craft Buds, sharing a review of the book Everyday Handmade: 22 Practical Projects for the Modern Sewist by Cassie Barden and Adrienne Smitke (Martingale).  Pop over there to check out everything Craft Buds has to offer (and it offers a lot!) and to read about my handmade Kindle cover, which is a pattern in the book.  There's also a giveaway, so get moving!

Kindle cover
and closed

March 27, 2012

Personalized Craft Labels

I celebrated my birthday recently, and I was so happy to get these personalized craft labels from Jen!

Labels

I've wanted to get labels for my handmade goods for a while now but could never make up my mind about what they should look like and where I should order them from.

Purchased on Etsy from Mommie Made It, http://www.etsy.com/shop/MommieMadeIt?ref=pr_shop_more, the design is printed on twill tape.  I'm looking forward to attaching them to a few quilts I have in progress.  Thanks Jen!

Labels

March 9, 2012

Quilting Weekend

This evening I'm headed to an overnight quilting retreat with members of the Indy Modern Quilt Guild, and I'm so looking forward to it.  If you don't see the fun in this sort of thing, well, clearly you're missing some crafty DNA or something.

I plan to start piecing a new baby quilt (commissioned by a friend) and work on a block tutorial that I've been asked to lead at the next IMQG meeting.  Of course this will all be accomplished amidst good company, good food, a few games, and the whirr of sewing machines.  I've heard rumors that cupcakes and Sangria will also be involved...now are you jealous?

Indy Modern Quilt Guild

February 29, 2012

String Blocks for Heroes Charity Quilt

Last fall one of my fellow bloggers and members of the Indy Modern Quilt Guild put out a call for help making string blocks for a quilt she wanted to donate to an auction benefiting the Heroes Foundation, which funds the development of cancer outreach programs promoting survivorship and supports the cancer community.  I saw Val's message at PinkPlease! and knew I could help out (and make my first string block, which I'd been wanting to do anyway!).  I also thought it would be a great beginner project for me to help a friend break in her new/used sewing machine.

Here are our blocks -- mine is on the top, my friend's is on the bottom:

Heroes string blocks

Yes, they look a little scrappy and crazy on their own, but Val combined our two little masterpieces with blocks from 45 other women, and check out the final quilt (photos from Val):


As if this beautiful quilt weren't enough, the Heroes Foundation auction was held last weekend and the quilt sold for an impressive $1000.00!!!  It's pretty amazing what can happen when people come together for a great cause.  Thanks Val!


January 3, 2012

Snowflake Latte


I couldn't resist sharing a snapshot of my snowflake latte, made by my dad on my last morning in Tennessee after Christmas.  Whenever I visit, he hands over my morning brew adorned with smiley faces, Christmas trees, snowmen, and even cats.  The snowflake is a delightful new addition, don't you think?

December 27, 2011

Sparkly Cuffs

Ah, the Christmas season lingers and after the cookies have been eaten, the presents unwrapped and now sit there staring at you...patiently waiting for you to put them away, what is a girl to do? Surf the internet of course and find wonderful, sparkly handmade items that are so impressive that it puts my small handmade goods to shame. I'm a little obsessed with cuffs right now and so I stumbled upon Dolores Petunia on Etsy and these cuffs are simply gorgeous as well as being totally custom.  Artist Courtney Price builds elaborate jewelry, headpieces and sashes that make me wonder "how did she do that?". I can just imagine myself in a little black dress with one of these beautiful pieces sparkling on my arm! I've featured my favorites below!

#1 Custom Spiderweb Cuff 
I love the shape and how delicate it is even with all of the volume.


#2 Custom Cuff - Orchid
I especially enjoy this one because of the stunning orchid set into all the sparkle. Orchids are the only plants I can keep alive, and this one is no different!

#3 Custom Cuff - Ruby
I love the little pops of color here and there and that ruby red is a perfect winter shade with grey.
All photos courtesy of Dolores Petunia


December 19, 2011

Grey Chevron Baby Blanket

Grey zigzag

I know what you're thinking: "Finally, she makes something grey! Isn't that the point of this blog?"  (At least, I'm sure that's what my dad is thinking. He always says "But that's not grey." Thanks Dad.)  Anyway, I love this baby blanket that I knitted, and it couldn't be more grey.
Grey zigzagGrey zigzag

The pattern is the Chevron Baby Blanket from The Purl Bee.  Chevron, zigzag -- whatever you call it, it's lovely and so easy to knit.  The Purl Bee made it in "a delicate spectrum of natural colors."  I made it in alternating heather grey and variegated grey and white using my favorite yarn for baby blankets, Bernat Softee Baby.

Grey zigzag

I enjoyed making this blanket, especially how quickly it knitted up on size 11 needles. The finished size is approximately 26x36 inches (mine's a little longer than the pattern version). I like this blanket so much that I immediately started another one in a different color combo. After I took this photo, though, I'm not sure if the rose is the best pairing with the variegated yarn, and I'm debating tearing it out and using pale yellow instead. I'd love to hear your opinion -- Should I change the color and start over?
Grey zigzag and peach in progress

LinkWithin

Related Posts Plugin for WordPress, Blogger...