Showing posts with label Precut Fabric. Show all posts

April 30, 2023

Two Quick Stash-Buster Quilts

While I'm in between big projects, I've been working on some relatively quick and small quilts that use up stash fabric.


The first quilt is simple pastel patchwork that came about because the box that contains my random charm squares (5x5 inches) was too full to close. I usually cut charms and add them to the box when I have odd pieces of fabric left over from a project or if I know the prints will work for a Project Linus donation quilt at some point. So for this quilt, I pulled out all the pastels I had and cut a few more to get it to this size. The more interesting thing about this quilt is the assembly -- I used the quilt-as-you-go method of basting backing and batting together and then adding each horizontal row of already pieced squares to the top, quilting across it a few times before adding the next row of pieced squares.


The second quilt is my version of Ruby Star Society's free Moon Cake Quilt pattern. I saw this quilt when a quiltalong was announced, and the piecing stood out to me because it's graphic and has some order to it. Honestly, I saved the photo but didn't really look at the pattern -- it uses a layer cake, which I didn't realize at the time, so I may make another one eventually and actually follow the pattern! Instead, I used 5" charm squares again, pairing prints with solids. The 2x4 piecing requires 4 charms of each fabric in the pair. It was another great one for digging into my stash and finally using up some fabrics that I've had for a very long time. I'm in the process of free motion quilting it right now, with a stashed twin-size bedsheet that was perfect for the back.


Moon Cake quilt pattern


May 29, 2022

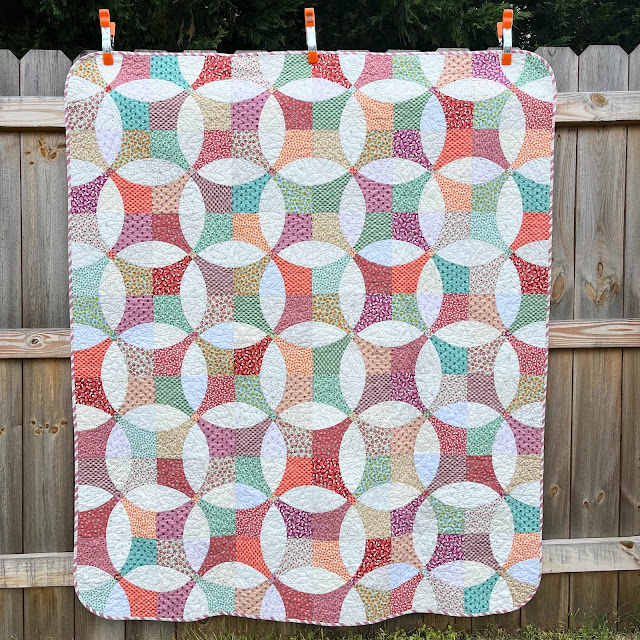
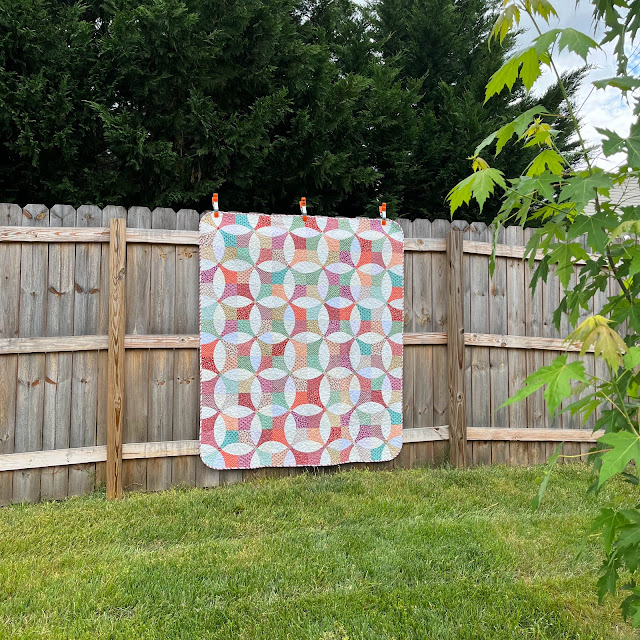
Flowering Snowball Quilt


This curve-filled Flowering Snowball quilt began when I bought the pattern and templates from Stitch Supply Co. but then stashed it with my other patterns without really making a plan to start. I knew that I'd want to make it someday, but I wasn't motivated to make that someday happen any time soon.


Then my friend Kelly (@stitchykelly), whom I've known since we were literally babies, posted on Instagram that she was starting on this very same pattern. I responded, "I have that too! Should we make them together?" and that was that. I had a fat quarter bundle of Elizabeth Hartman's Berry Season waiting for the perfect project. This pattern allowed me to pull out a half dozen or so of my least favorite prints (mostly yellow and brown) and use the rest. For the background I turned to my admittedly extensive stash of low volume neutrals and scraps from another quilt in which I mixed them up as well.


I enjoyed cutting all the pieces -- a rotating mat and small rotary cutter are must-haves. The only thing I would have done differently is to put something with more contrast in the junction of the prints, where the little square is. Maybe something dark, and the same fabric in each block so it shows up better.


Piecing the curves went better than I expected. The pattern offers good tips and guidance for best results, like which direction to sew in and where to pin. This was the first time I didn't load up my curves with pins, and it still worked out great.


Keeping with the theme of this project, sewing the blocks together into the top went better than I expected, too. I didn't need to trim the blocks to size, and my seams matched up surprisingly well. This could just be luck, but I think good directions and attention to detail contributed, too.


One thing I struggled with was choosing a backing. I wasn't sure which direction to go in since there are so many small prints and motifs on the front. But this orchid stripe by Rashida Coleman-Hale turned out to be the perfect choice. I ordered a charm pack of this Adorned line first, just to make sure I was happy with the color. Then I found the yardage on sale and ordered a lot (more than I needed for this quilt) because I know I can use it again in the future. Bias striped binding is hard to resist, and once you've made bias binding, you might as well round the corners, so that's how those two things came to be. The quilting was done by a local long armer using the Dainty Lady Floral design by Urban Elementz.


Overall, I'm very happy with how this quilt turned out. I'm keeping it for myself because, well, it was a lot of work! (Also I usually only invest in longarm quilting when I'm keeping the quilt or giving it as a gift.)

March 27, 2022

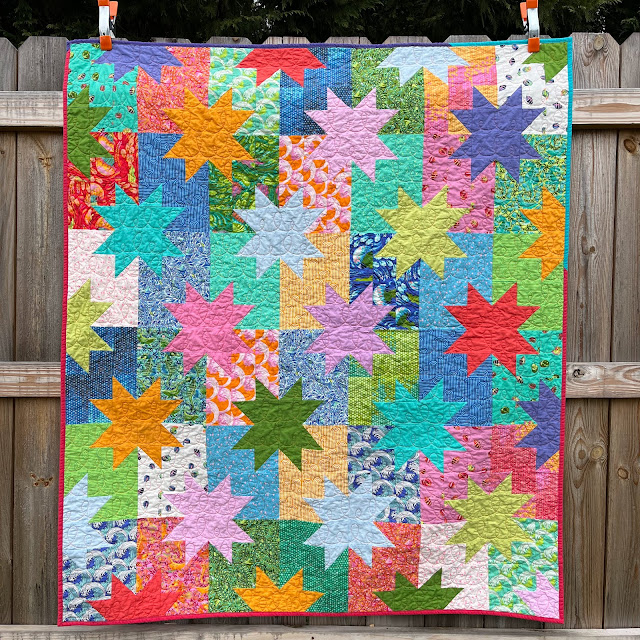
Star Pop Quilt


This quilt was an energizing project to work on during the depths of winter -- it gave me summer vibes and brightened my sewing room up considerably. The pattern is from Emily Dennis of Quilty Love (available to purchase here), and I bought it pretty much as soon as it was released because it's layer cake-friendly. (Those are 10-inch precut squares, for anyone who doesn't know.) I have a few layer cakes in my fabric stash, and they can be a little tricky to use because, well, they're 10-inch squares and it doesn't seem like there are a lot of things to do with that. But this pattern proves that you can, in fact, do a lot. (You can see all of Emily's Star Pops here.) I made the throw size, which uses one layer cake.
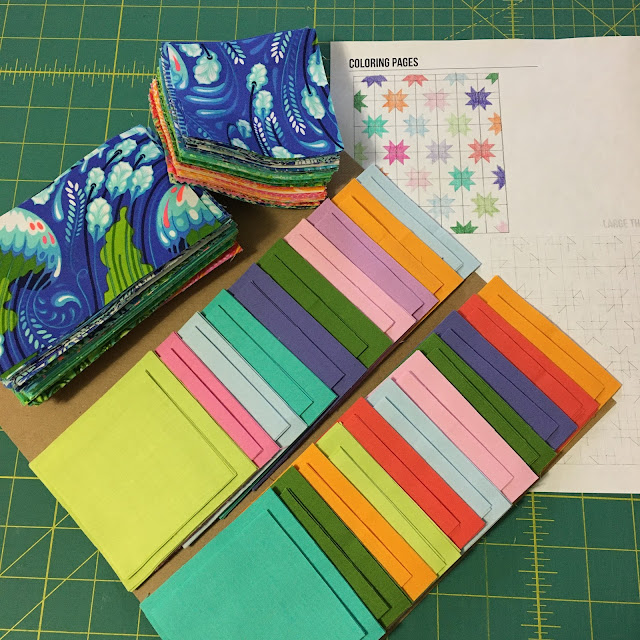


I used a Tula Pink layer cake because I loved all the vibrant colors and prints. When I started this quilt, all the Star Pops I was seeing on Instagram featured one fabric (usually a neutral) in the stars. A few of the Tula Pink prints are on a white background, so I didn't want to put a white star next to those prints and have everything blend together. So I started to consider colored stars, and then I pulled out lots of solid fat quarters in colors that complemented the prints. It was a "use what you have" moment of inspiration, and I'm really happy with the result. And it was more fun and more interesting to sew all the different combinations. I did have to do a little planning, however, to ensure that I paired the solids with the right prints to make the overall pattern work. But that's what the coloring sheets that Emily provides with her pattern are for!
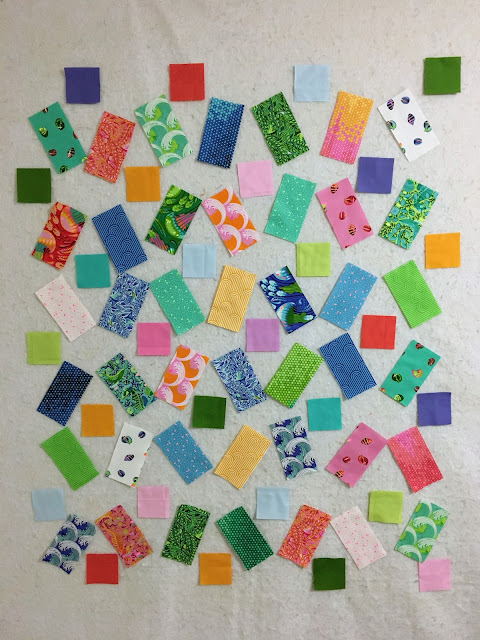


After cutting, I put everything up on my design wall, starting with the solids according to my star map and then filling in the gaps with the prints. It was tricky to position similar prints and colors away from each other, and there are a couple in the finished quilt that I probably would have shifted around, but overall it works.


As I sewed the half-square triangles with solids and prints, I was able to start assembling the stars on the blocks on the wall and see how the stars were coming together. This is usually my favorite part of the quilt process.


Another thing I like about this project is that it was very easy to work on in small chunks of time. I could sew some pieces, press HSTs or assemble a block or two and then walk away and come back to it later. So it's a good one if you have a day job and want to sew a little to relax in the evening but can't handle getting fully immersed every time.


Pretty soon I had a finished quilt top, and I decided to stick with the theme of bright colors and use my solids stash to make a pieced backing. I don't often love how my pieced backings turn out (sometimes there's just something not right about them), but I didn't overthink this one. And it turned out great. Maybe that's the lesson!


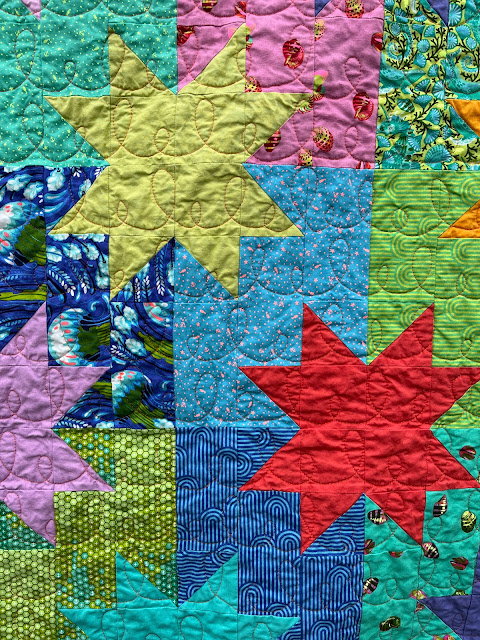
For the quilting, I decided to try a new-to-me design on my domestic machine, making short and tall loops across the quilt horizontally and using the blocks as my guide. I used bright orange thread, again keeping with the colorful theme. It shows up in some places more than others, but any thread was going to do that. So why not make it orange!


The binding was also made using solid scraps. I couldn't resist taking more photos than usual of this burst of color on my backyard fence.


(That maple tree started as a seed that landed in a potted plant on my parents' deck a few years ago. They let it grow there until it was finally big enough for its own pot, and after a few bigger pots, it finally made its way into my yard.)

November 10, 2020

Jelly Rainbow Quilt


I don't think I'm the only quilter who would say that staying home more this year hasn't been an absolute hardship. More time for quilting? I'm in. One of my quarantine quilt finishes is this Jelly Rainbow Quilt featuring Amy Butler fabrics. The pattern is free from Ruby Star Society and Moda Fabrics, and back in April, Devon (@missmake on Instagram) started a quiltalong. I talked my mom into doing it with me, and I was able to use two mini jelly rolls that I'd gotten from a friend in my guild who was destashing.


I really enjoyed making this quilt -- it's extremely easy but doesn't look overly simplistic. And I was able to make it completely using fabric from my stash, which almost never happens. I pieced the backing with leftovers from fat quarters, a jelly roll and a yard of Amy Butler fabric that I found at Tuesday Morning a while ago. It's crazy, but I think it works. The binding was already made and leftover from another project. It was just a few inches short, so I had to add the little green bit to finish. Viva la quarantine!


I donated this quilt to my local chapter of Project Linus for a child in need. I'm putting the pattern back on my to-do list, maybe for 2021, and I'd like to cut my own jelly roll strips from stash. If you're looking for a quick, satisfying and not overly large quilt, this one is a winner.


LinkWithin

Related Posts Plugin for WordPress, Blogger...