September 9, 2012
August Ornament: Snowman
I had every intention of posting my August snowman ornament weeks ago, but my first idea and attempt didn't turn out quite as planned. What I ended up with was actually a modification of my original original idea, so clearly there was some frustration involved, and I decided to start fresh with a new idea. Then I went on vacation for a week. And that's where we are now -- after arriving back home on Sept 1, I got to work and finally have a snowman ornament to show off.
I followed the tutorial available here. Unfortunately the tutorial doesn't include a template for the snowman, so I had to draw my own. I cut two shapes from white wool felt, added scraps for the hat and nose, and sewed on some tiny buttons from my button jar. Finding twigs for the arms turned out to be the hardest part of this project! I live in a condo with a pretty diligent landscape maintenance crew, so tiny twigs were nowhere to be found. I finally found some outside a church nearby, and although they weren't quite as perfect as I wanted, they do the job. After a little hot glue to keep them in place, I stitched around the outside of my snowman, added stuffing, closed up the edges, and tacked on the scarf. I was almost done before I remembered that it needs a hanger, so a loop of yarn through some stitches on the hat had to suffice.
Google Images has loads of photos of really cute felt snowmen -- just search "felt snowman ornament."
September 7, 2012
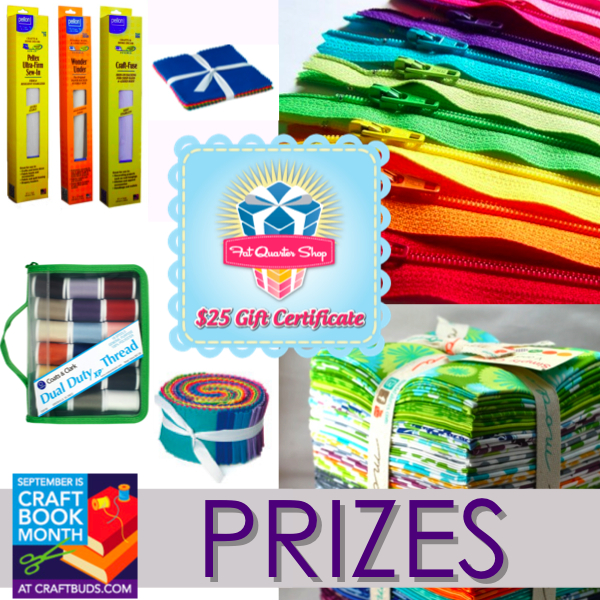
Giveaway: Craft Buds' Craft Book Month Blog Hop and FreeSpirit Friday
Back-to-school season means its time to hit the books. Craft books, that is! We love craft books for their inspiration, stunning photography and crisp, glossy pages. Hard covers or soft, we just love craft books, and we know you do, too!
All month long in September, our friends at Craft Buds will celebrate sewing, quilting and all kinds of craft books by shining the spotlight on new releases, interviewing authors and editors who make the magic happen and giving you a chance to win.
Blog Hop
Week OneSunday 9/2: Hopeful Threads / The Jolly Jabber
Monday 9/3: Stitchery Dickory Dock / Me Sew Crazy
Tuesday 9/4: Olive & Ollie / Sew Sweetness
Wednesday 9/5: Fabric Seeds / The Busy Bean
Thursday 9/6: CraftFoxes / Stitched In Color
Friday 9/7: Katie's Korner / A Prairie Sunrise
Week Two
Sunday 9/9: Sweet Diesel Designs / missknitta's studio
Monday 9/10: Sew Tara / Clover and Violet
Tuesday 9/11: Sew Fantastic / amylouwho
Wednesday 9/12: Projektownia Jednoiglec / Two More Seconds
Thursday 9/13: Ellison Lane Quilts / Don't Call Me Betsy
Friday 9/14: Live a Colorful Life / LRstitched
Week Three
Sunday 9/16: Fairy Face Designs / Canoe Ridge Creations
Monday 9/17: Inspire Me Grey / Freshly Pieced
Tuesday 9/18: Lindsay Sews / The Cute Life
Wednesday 9/19: The Littlest Thistle / Sew Crafty Jess
Thursday 9/20: Urban Stitches / imagine gnats
Friday 9/21: Sew Bittersweet Designs / The Plaid Scottie
Week Four
Link up your craft book project at Craft Buds from Sept 23-30 from your blog or Flickr account, and enter to win prizes. Winners will be announced on Monday, October, 1!

To participate in the month-long contest, just link up any project you've made from a pattern in a craft book. That easy! You'll tell us a little about the book, the project, how you personalized it, etc.
Rules:3) Create a new blog post or Flickr photo (dated September 1, 2012 or later) and link back to Craft Buds/Craft Book Month in your post or photo description.
No time to create a project? This month, just follow Craft Buds and comment to win some new craft books and lots of giveaways! We'll also have expert Q-and-As to show you what it takes to write a craft book, from the initial idea to the layout, photography and the actual printed product.
August 30, 2012
Reading Nook for a Toddler
One thing I've learned about my daughter is that she loves to climb under all types of tables and chairs. I wanted to give her a place of her own and crafted a little reading nook in our living room for her.
The ingredients for this little DIY project are simple.
1 child-sized folding table (I found this one at Walgreens for $15)
1 plastic table cloth (I found this at Target on clearance for $2 last year)
Scissors
1 spool of ribbon
This is a great nap time project since having your toddler trying to grab your scissors is really annoying (I learned the hard way). Spread your tablecloth over the folding table and cut a triangle out for the doorway. Then gather the sides towards one of the front table legs, cut a slit in the tablecloth behind the leg, and slip a length of ribbon through it. Tie a knot and a bow to hold back the extra tablecloth. Do this again on the other front leg. For the back legs I simply gathered all the extra material until the sides were smooth, cut slits on both sides of the table legs, wove the ribbon through, and knotted and tied it to keep the tablecoth in place.
If you want to get creative, you can cut out a fancy 4-pane window on the side; however due to my toddler's desire to pull on things, I opted just for a rectangular window that she could peek out.
The last thing to do is to lay a blanket or old pillow inside along with your child's favorite books. Hannah spent about 30 minutes just going in and out and looking at me through her window. When she's tired of it and big enough to use the table for drawing, I'll remove the cover, but for now, it's her own little reading nook.
August 24, 2012
Big Finish: Airplane Baby Quilt
It turns out that my mom is a really good source of quilting jobs for me. Many of her friends are becoming grandparents and are looking for special, personalized gifts to give the new additions to their families. That's how this airplane quilt came to me.
A friend and neighbor asked if I would make a quilt for a new grandson, and if I could make it blue with some sort of airplane theme to match his room, that would be great. After some searching both online and at my mom's local quilt shop for airplane fabric, I discovered that airplanes just don't seem to be "in" now as far as childrens' novelty fabric goes. Space ships? Sure. Dump trucks? We got 'em. Cute little cars on city streets? Take your pick. But airplanes, not so much. So I abandoned the idea of using airplane fabric and decided instead to make my own airplanes.
I found a piecing tutorial that seemed pretty popular with quilters online, and although I liked the end result, the process was just too loosey-goosey for me -- not a lot of measurements or detailed instructions. So I dug a little deeper and came up with a foundation paper piecing pattern that I used instead. (The pattern is available for free download here.)
I collected a variety of blue, white, and red prints for the airplanes and used two light blue prints (which have been living in my fabric stash for ages) for the block backgrounds. I considered a straight layout with sashing, sending all the airplanes flying in the same direction, but in the end I decided to let go of some of my usual structure in layout. My design wall was a great help, as it allowed me to place the airplane blocks in the directions and pattern I wanted and then fill in the space in between with red and blue solids. I'm new to improv quilting, so this is as improv as I get right now. I created the quilt top in 3 columns before sewing them together and trimming the whole thing down.
The blue chevron Dear Stella fabric that I found for the back may be my favorite thing about this quilt. The colors are perfect, and it adds the right amount of fun to this baby quilt. Plus it feels so soft and silky. I quilted this one with organic wavy lines in two colors of blue thread.
August 12, 2012
Baby Boy Quilt: Little Bow Ties with Grey
This is a quilt that I currently have in progress, commissioned by a childhood friend of mine who is expecting Baby #5 (!!!). Chrissie and I were best friends like only little girls can be, until my family moved out of state when I was 9. When letter-writing and long-distance phone calls were the only way to keep in touch, we gradually lost contact. But thanks to Facebook we have been in contact again after many years, and I gladly accepted the baby quilt commission when she asked. Chrissie told me that she'd like to focus on grey for her baby boy, with pops of lime green, orange, and aqua. I sent her a few designs to consider (all from one of my favorite quilt bloggers Film in the Fridge), and she chose this "Flying Farfalle" design. You can see the original by Film in the Fridge here.
For inquiring minds, I started with 6.5" blocks of Kona Medium Gray and added a selection of prints to opposite corners. The layout is 7 blocks by 9 blocks. I haven't yet figured out what I'll do on the back, but first up is getting these blocks into rows and those rows into a complete quilt top.
August 8, 2012
Snowmen: 12 Months of Ornaments {August Theme}
This month's theme for the ornament challenge is SNOWMEN. During these hot summer days, it's nice to think about the chill of winter and a nice fresh blanket of snow over everything. Keep an eye on the blog this month to see what we create!
August 1, 2012
July Ornaments: Gingerbread House and Peppermint Candy
The theme for July ornaments in our little challege here at Inspire Me Grey was sweet treats. While browsing Google Images for ideas, I came across this gingerbread house. I sketched it for reference and then set to work making my own version. This is all felt and embroidery floss, and I got an assist from a sparkly friend to add glitter to the gumdrops on the rooftop. (Alas, my craft supply is glitter-less.)
A couple of weeks ago I went to TN for a short visit, and while I was there I convinced my mom that she needed to make a July ornament too. She came up with this simple peppermint swirl candy that I think will look sweet on the tree come December.
Subscribe to:
Posts (Atom)