December 5, 2013

My New Favorite Thing: A Favorite Things Exchange


Recently I posted instructions for a 5-minute infinity scarf that I whipped up for a "Favorite Things" party, but I realized that this type of party was new to me so it may also be new to you. Here's the rundown on one of the best party ideas ever.

Ingredients for a Favorite Things Exchange:

1. A hostess (or hostesses) willing to have a clean house and set up everything.
2. Snacks and drinks, either provided by the hostess or brought by guests to share
3. Loot bags*
4. Vase or bowl to pull names from, pens, and paper*
5. Door prizes*
6. Party guests: In my opinion, the guest list should be limited to 12 or fewer.
* responsibility of the hostess

Steps for a Favorite Things Exchange:

1. Send out invites. This is a great mixer for people who don't know one another. Our hostess had old friends and new friends and neighbors all mixed together, and it was great!


Suggestion for wording your invite:
Think of something you love that costs under $10, and bring 3 of that item to the party. We will draw names and everyone will go home with 3 amazing new finds.
 
Now, you can decide to do 6 things under $5 or whatever combo that might be interesting (maybe 10 items under a $1) -- just do whatever sounds fun and appropriate for your group.

2. If you're a hostess, you'll need to supply loot bags for guests to take home their collected gifties.


3. You'll also need a stack of scrap paper for people to write their names down and a vase or bowl to collect them in. If your exchange involves 3 items from each person, then each name is written on 3 slips of paper. If you're doing 6 items, then names go on 6 slips of paper to ensure everyone goes home with the right number of gifts.


4. No party is complete without food and drink. Our hostesses put out quite a spread. Appetizers are perfect for this kind of party because you can try a little of everything and not feel stuffed at the end of the night.


5. Now for the Favorite Thing portion of the evening. Each guest stands in front of the group and shares why their favorite thing is their favorite thing.  Then that guest draws 3 names (or 6 or however many gifts you're distributing), and those 3 people get to take home that particular favorite thing. I shared that my sister Elizabeth had made me an infinity scarf that I wore when traveling internationally. I loved it because it was soft and it kept me cozy on drafty planes.  Then I drew 3 names and passed out scarves to those 3 guests.

Here are a few of the favorite things from our party. I ended up taking home the eye makeup remover and hair corkscrew, an EOS lip balm, and a pack of basil-scented Meyer cleaners for the kitchen (which I LOVE).

The best eye makeup remover and hair corkscrew
The best dry shampoo and Sharpie brushes
A favorite Essie nail polish and foundation base
A wire angel from a favorite store
"Party in your mouth" toothpaste and a cute cosmetics bag
The best thing post-pedicure to keep your feet soft

The best thing to end a cold day
The 5-minute infinity scarf (instructions here)
6. After everyone has presented and given out their favorite things, throw all the names back into the bowl and draw for door prizes. I won a December "Favorite Things" issue of Oprah's O magazine, and another guest won a picture frame from the hostess's favorite craft store.  We also went home with mini-pies from a pie shop that just opened in town. Any party that ends with a pie is alright with me!

I would love to hear about similar Favorite Thing parties. Please share and check out our Pinterest board we're building for Favorite Thing gift ideas!

November 25, 2013

DIY 5-Minute Infinity Scarf

5-Minute Infinity Scarf
My sister gave me an infinity scarf that is so soft and comfortable that I could wear it everyday. When I received an invitation for a "Favorite Things" party in the mail, an infinity scarf was the first thing that came to mind.
After consulting Elizabeth, I purchased 4 yards of Cherry Red Tonal Stripe Cotton Jersey Knit at Girl Charlee Fabrics, my favorite online fabric shop for knits. (Four yards of fabric produces 4 scarves, which is what I needed for the party.) In order for this to be a 5-minute project, you must buy cotton jersey knit fabric that has a double-sided print; in this case, the stripe is woven, so it appears the same on both sides of the fabric. Otherwise, you have to take a few more steps in your scarf construction to hide the non-print side -- you can find a tutorial for that method at Sew Creative blog.

Materials:
2 yards of fabric 54-60" wide (this will produce 2 scarves)
Scissors
Sewing machine
Matching thread and bobbin

Steps:

1. Fold fabric lengthwise and lay flat. Cut along the fold, producing 2 rectangles that are each 2 yards long and 30 inches wide.
2. Fold and pin the short ends together to create a tube.


3. Ensure your sewing machine is ready for knits. Use scrap fabric to sew some test seams with a zigzag stitch. Knits are troublesome -- they tend to catch, gather, and fight you. It's important to get your presser foot tension right or you'll find yourself frustrated.
4. Sew the short seam using a zigzag stitch.  Turn and sew the seam again to ensure that the seam is secure. The seam will be hidden in the folds of the scarf, so neatness isn't critical.


You may be asking yourself, "What about these raw edges along the long sides of the scarf?" That's the brilliance of the knit fabric. The raw edges will roll both along the edge and at the seam, and because it's knit fabric, it won't unravel.

Tip: If you finish your scarf and decide to adjust the length so that it loops and lies differently when you're wearing it, simple cut off your seam, shorten the length, and resew.


October 24, 2013

DIY Monogrammed Fall Wreath

I bring you another Pinterest success story just in time for fall decorating, and if you do it right, you can swap many of the elements out for a Christmas version (more to come on that one).

Here's the Pinspiration from the wonderful Etsy store theembellishedhome where it was sold out:

Photo copyright theembellishedhome

Here's my version:


I was able to get all of the materials at my local Hobby Lobby, which made it easy to shop and assemble the wreath all in one weekend. Total cost of the materials ran about $50; if you make one with a friend, you could easily save $10-15 by using coupons and sharing the decorative ribbon. If I had been focused, I think I could have completed my wreath in two hours, but Surviorman was on TV that night and I kept getting distracted by how he was able to keep a fire burning through a thunderstorm.  You know how it is.

Materials

  • Wreath frame (20-inch diameter)
  • Floral wire or pipe cleaners
  • Wire cutters
  • 3-4 hydrangea blossoms
  • 2 bundles of plain burlap ribbon, each 8 inches wide by 15 feet long (If you purchase narrower burlap, expect to use 3 to 4 rolls.)
  • 2 rolls of decorative burlap ribbon (1 solid, 1 print)
  • 12-inch letter
  • Hot glue gun


Step 1
Attach the burlap ribbon to the cross piece of the wire wreath frame. I found that "basting" the ribbon with a piece of the floral wire (about 4 inches long) then wrapping the wire around the wreath frame with a few twists secured the ribbon easily.


Step 2
Create a loop and attach the burlap to the next wire in on the wreath frame. A couple of things to note: This is not a science, and your loops don't have to be perfect. Just work your way up and down the wreath frame, shoving the loops together and adding more. It takes a while to work around the wreath, but you'll use both rolls of burlap.


Step 3
When you've made it all the way around with the burlap it will look something like this. Notice the "bare" spot in the top right (2 o'clock) where you'll attach the bow.


Step 4
Time to make the bows. Make four loops out of your solid burlap ribbon and tie them together with floral wire that is 7-8 inches long (don't cut off the excess wire).


Step 5
Make another four-loop bow slightly smaller than the solid bow. Use the wire on the solid bow to create the knot.


Step 6
Use the floral wire to attach the stacked accent bow to the wreath base, and then adjust it until you like how it appears. You may also need to adjust the burlap below it so that the ribbon lays properly.


Step 7
Use your wire cutters to remove the leaves from the floral stems. Cut the blossoms off the floral stems, leaving just 1 inch of stem on the blossom. This is enough to secure to the burlap with hot glue.


Step 8
Keep the wire cutters out. Flip the wreath over and wind the wire ends from the burlap back up into the wreath. Trim the ends were necessary. They key here is to make sure you can run your hand along the back of the wreath without being scratched. Adjust any rough spots so you don't damage your door.

Step 9
Attach the flowers with minimal hot glue if you want to be able to swap out the colors with the seasons. Wire the letter to the wreath. I also added a few hot glue dots here and there because I didn't want the letter to shift. My floral wire was green, so i hit it with a Sharpie marker and a decorative gold marker to mimic the detail on the letter. You can't tell unless you're up close to the letter, which is fine -- it's a wreath, people!


October 16, 2013

Swapping Fall: Neighborhood Project

Recently our family had just returned from a fro-yo outing after dinner when there was a knock at the door. My husband went to check it out after I gave him the I'm-not-the-kind-of-girl-who-answers-doors-at-night look. He came back in carrying this cute gift that was left on our doorstep with a note.


Officially, our basket arrived with a teddy bear, 2 fall themed kitchen towels, 2 packs of crayons, 1 pack of markers, 4 apples, 3 small bottles of bubbles, and a delicious bag of oatmeal spice cookies. The cookies were the first to disappear, and it took everything I had to keep our daughter focused on the teddy bear and not blowing bubbles inside the house that night. Someone in our neighborhood knows we have a toddler!

Inside we found an explanation and directions:


This now hangs next to our front door.
Since it was my turn to "Pass It On," I put together this basket for our neighbors who have two teenage daughters, two cats, and a dog.


I filled a chicken wire basket (bought at Joann's with a 40% off coupon, of course) with a picture frame, 2 fall themed kitchen towels, a bottle of sparkling cider, a box of Starbucks hot cocoa with marshmallows, a can of whipped cream, a homemade pumpkin pie (we enjoyed its twin), and small bags of dog and cat treats for their furry family members.

I'll admit that I broke the rules -- I didn't leave this on their doorstep. Instead I rang the doorbell, handed it to our neighbor, and said "You never saw me, but I didn't want to risk leaving a homemade pie on your doorstep overnight," to which she laughed.

Happy Fall Ya'll!

October 14, 2013

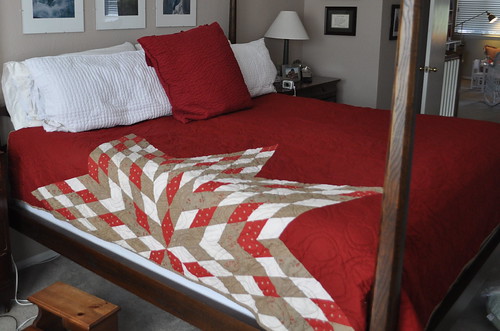
Big Finish: Cropped Lone Star Quilt

Cropped Lone Star Quilt

I'm so happy to be able to share these photos of the finished king-size Lone Star quilt that I've been working on for a large part of this year.  I created the top, backing, and binding for my college friend Marcy, and then I sent it to her to arrange longarm quilting and finishing.

I wrote about this project when I had the star in progress back in July.  I started with loads of fabric:


I prewashed and pressed everything, and then I cut strips for the star:


I sewed 6-strip units and cut them on a 45-degree angle to create the large diamonds for the star:


I used y-seams to insert pieces of solid red between the points of the star:


I added strips of red to the top and bottom of the star panel to achieve the desired length of 95 inches:


The star panel was a little over 1/3 of the desired width for the quilt - 105 inches - so I added two red panels to fill out the rest of the width.  I squared it up as best as I could along the way (king-size is huge!), and packed everything up to mail to Marcy.  She met with the longarm quilters at A Better Quilt (http://abetterquilt.com/) to select a quilting design, and they had it done for her in a week - impressive!

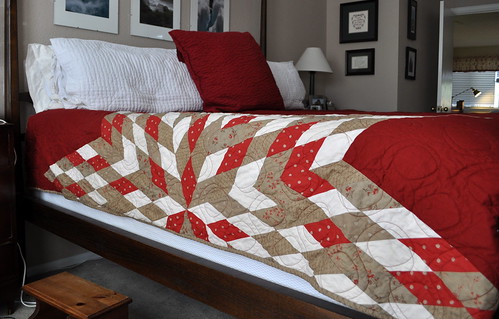
Cropped Lone Star Quilt

The large swirly design softens the sharp lines of a quilt this size, and I think it turned out so great.  I'm pleased that Marcy and her family are so happy with the quilt, and I hope they enjoy it for many years.  I wouldn't say that a king-size Lone Star quilt was on my quilting bucket list, but now I can put it on and check it right off.  Done!

Cropped Lone Star Quilt

September 29, 2013

Big Finish: Jungle Patchwork Baby Quilt


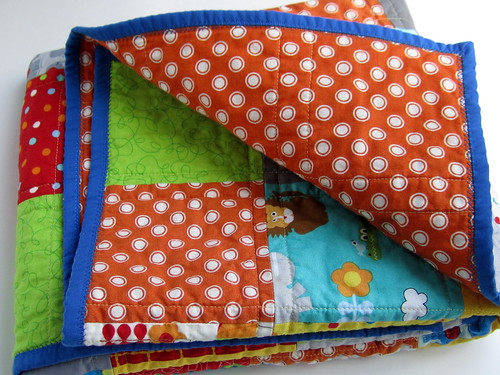
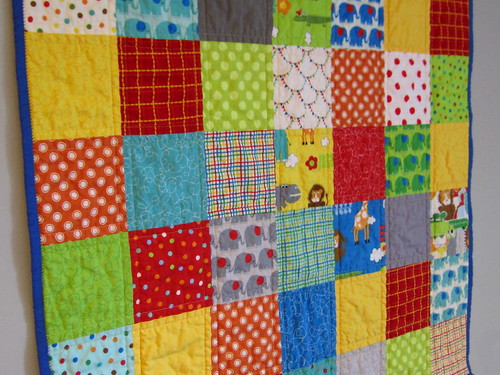
I started this baby quilt with a charm pack (a collection of 5-inch squares) of Moda's Bungle Jungle.  I pulled out some of the squares in the pack because, in my opinion, the fabrics didn't fit well with the jungle animals, and I replaced them with a variety of dots, solids, and a few plaids from my fabric stash. Oh, and that little bunting print, which I love.

I quilted this with yellow thread in straight lines 1/4" from each seam.  The simple grid complements the patchwork squares and keeps the quilt soft enough for a baby. The finished size is 30" x 35".

IMG_2340

This quilt is headed to my good friend's new baby -- littlest brother of the recipients of this quilt I made last year.

IMG_2352

Some friends asked for basic instructions for this type of patchwork baby quilt, so here's how I assembled the top. This patchwork design is very forgiving, so it's a good pattern to start with if you're a new quilter. For a finished quilt that's roughly 30" x 35", start with 56 5-inch squares. Arrange them to your liking in a 7- x 8-square layout, and then start sewing them into rows.  In a row, sew the squares in twos: 1 & 2, 3 & 4, and 5 & 6. Then go back and sew together 2 & 3 and 6 & 7. Finally, sew 4 & 5 together, and you should have a complete row. Press your seams to alternating sides according to the row (for example, the seams in the first row are pressed to the right and in the second row are pressed to the left). After you sew all your squares together into rows, you sew the rows together to build the quilt top. Again, I start with 2-row sections, then put 2 rows with 2 rows, and then 4 with 4. I'm a pinner, so I recommend matching up and pinning the center seam on two rows. Work your way to either end of the rows, pinning at each seam. Your seams that are heading in opposite directions should nestle together at each intersection. Sew slowly and remove the pins as you sew the rows together. If your seams don't match up perfectly, don't fret. That's what makes it handmade.

Jungle Patchwork Baby Quilt

September 22, 2013

Little Paper Pieced Jack O Lantern


Wonky Jack

The quilting gene runs in our family, however I (Jen) am the exception. So, I not only appreciate those who quilt but I love being the beneficiary of quilted gifts and I just received one last week!

Check out the cute, paper-pieced Jack O Lantern wall decoration my mom gave me for the house this fall. I love the different fabrics she used -- especially for the teeth.

This foundation paper pieced Wonky Jack pattern came from Fons & Porter's Love of Quilting Magazine 2004 and there is a $5.99 digital version which includes this pattern as well as others.

It turns out that my sister received her own Wonky Jack from Mom years ago and proceeded to make one for a friend as well.  This pattern is quite easy to follow once you get the hang of foundation paper piecing. There are plenty of great tutorials online for the technique, like this one and this one, and it's nowhere near as difficult as it may seem at first glance.

September 14, 2013

Craft Book Month: Pillow Pop


Hi everyone!  September is Craft Book Month over at Craft Buds, and the 3rd annual celebration has been a blast so far. The idea behind Craft Book Month is to dust off some of those craft books you've collected and actually make something from them (I know, what a novel concept!). I've been following along with all the wonderful bloggers who have posted about their books and projects, and I'm happy to join the party again this year. (You can find all the blogger links at the end of this post, so you can admire their handiwork as well and maybe get inspired to pick up a new book or two.)

This year I decided to request a bunch of craft books from the library and see what jumped out at me. I picked books that I've been seeing and reading a lot about in sewing and quilting circles online, and I was not disappointed! I found a bunch of projects that I'd like to try, and in the end I chose a pillow pattern from Pillow Pop: 25 Quick-Sew Projects to Brighten Your Space by Heather Bostic. The book is a compilation of pillow patterns/projects from a variety of contributors, so a lot of different styles and techniques are represented.


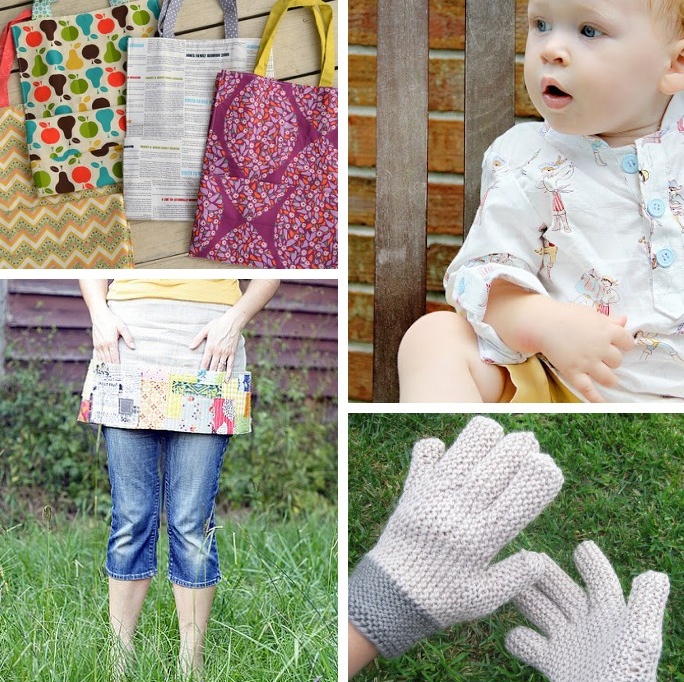
In true indecisive-crafter fashion, I snapped photos of my 4 favorite projects and sent them to my mom so that she could help me decide which one to make. Lucky enough, her first choice was my first choice too! These were my faves --


I made the first one, the Jewel of the Sea, which appears on the cover of the book.  I used Madrona Road fabric that I had on hand from the Modern Quilt Guild challenge that I participated in earlier this year (when I made this quilt). I've kept that quilt to use in my guest room, so a matching pillow just made sense.

IMG_2286

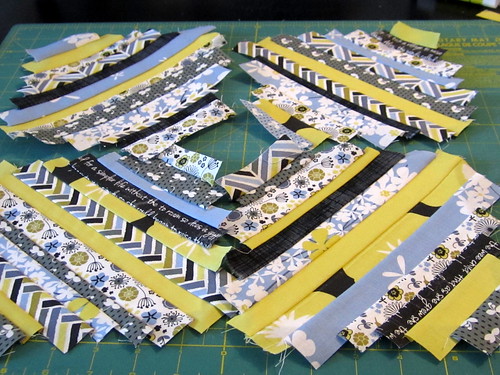
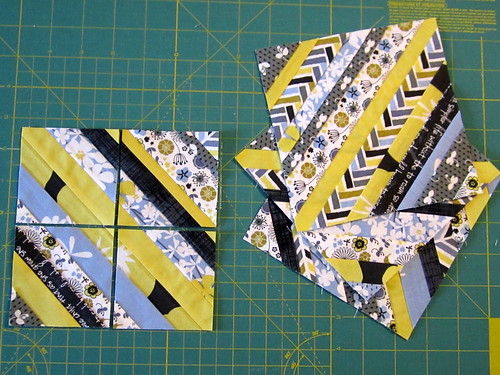
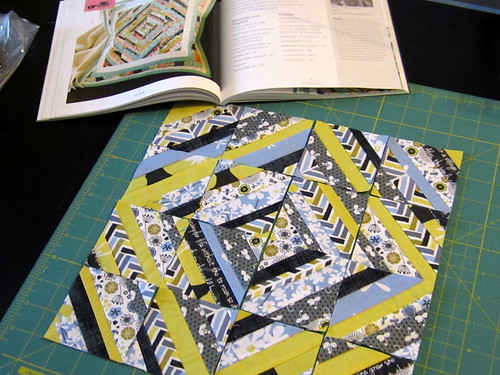
The shattered design looks complicated, but it's simple string blocks that you then slice into 4 smaller blocks. (3 inches! So cute!) A little mixing and switching around, and the center of the pillow is done.

Madrona Road pillow

Madrona Road pillow

Madrona Road pillow

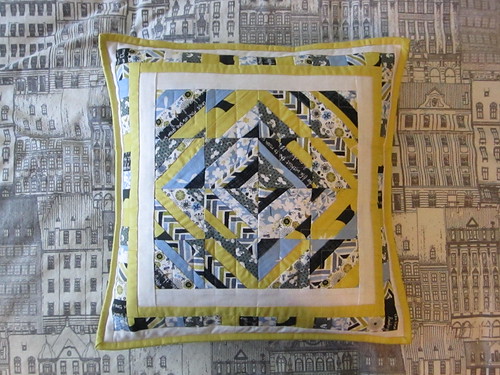
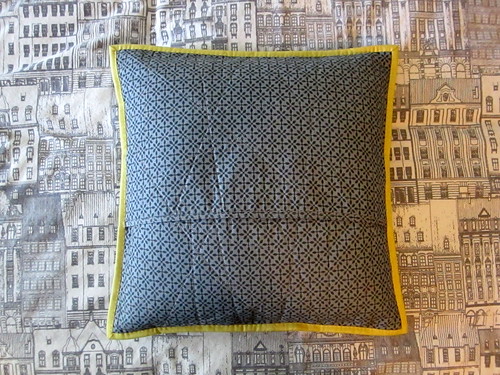
I added yellow and white borders to keep the front light and bright.  The backing is a Silent Cinema print that's a nice shade between gray and blue.

Madrona Road pillow

Madrona Road pillow (and Jack)

I'm really happy with this pillow and think it looks pretty spiffy on my guest bed (the cat likes it too).  I recommend the book Pillow Pop for all the variety it offers -- I still have 3 more favorite pillows to make!

Craft Book Month

It's the 3rd Annual Craft Book Month at Craft Buds! This year, we're excited to celebrate all month log with a blog hop of your inspirational craft book projects, a crafty contest, free patterns and prizes!

Don't let those craft books sit on your shelf and collect dust! We want to see what you've been making. That's why I've teamed up with some fabulous bloggers who will be showing off their projects made from craft books, all month long!

Blog Hop

Week One

Monday 9/2: Fabric Mutt / LRstitched
Tuesday 9/3: Stitch This! The Martingale Blog / Stitched in Color
Wednesday 9/4: Fabric Seeds / Pile O Fabric
Thursday 9/5: The Feisty Redhead / Rae Gun Ramblings
Friday 9/6: Sew-Fantastic / Clover + Violet
Saturday 9/7: A Prairie Sunrise / Small Town Stitcher

Week Two

Monday 9/9: Hopeful Threads / Go To Sew
Tuesday 9/10: The Sewing Rabbit / Sewing Mama RaeAnna
Wednesday 9/11: Marci Girl Designs / imagine gnats
Thursday 9/12: Sew Sweetness / amylouwhosews
Friday 9/13: Lindsay Sews / 13 Spools
Saturday 9/14: Inspire Me Grey / Angela Yosten 

Week Three
Monday 9/16: Sew Very / Craftside
Tuesday 9/17: The Littlest Thistle / CraftFoxes

9/1-9/30: Link up your craft book project at Craft Buds from your blog or Flickr account, and enter to win prizes. Winners will be announced on Tuesday, October, 1!


2012 Craft Book Month Projects (L to R):

Sew Crafty Jess, Sewing Rabbit, Stitched in Color, MissKnitta's Studio

To participate in the month-long contest, just link up any project you've made from a pattern in a craft book. That easy! You'll tell us a little about the book, the project, how you personalized it, etc.

Rules

1) One entry per person. 

2) Your craft book project must have been completed in 2013. 

3) Create a new blog post or Flickr photo (dated September 1, 2013 or later) and link back to Craft Buds/Craft Book Month in your post or photo description. In your post or photo description, make sure to list the craft book you used and provide a link if possible.

4) All winners chosen via Random.org. Some prizes available to international winners, so please join us!

Prizes

Visit Craft Buds and link up your craft book project during the window of Sept 1-30 and you'll automatically be entered to win some fantastic prizes from the Craft Book Month sponsors!

No time to make a project? You can also follow Craft Buds all month long for your chance to comment and win some new sewing and quilting books for your library.


 Craft Book Month at Craft Buds

LinkWithin

Related Posts Plugin for WordPress, Blogger...