April 27, 2012

Book Review: Everyday Handmade


Everyday Handmade: 22 Practical Projects for the Modern Sewist by Cassie Barden and Adrienne Smitke (Martingale) is a promising addition to any modern sewist’s craft library. Whether you’re looking for a small, simple project to give you a break from that quilt you’ve been slaving over or you’re in the mood to create something featuring some favorite fabrics from your stash, Everyday Handmade is likely to please.


Beginner-level projects include a simple tote bag decorated with fabric-covered buttons, pieced coasters and potholders, and a sewing set that includes a pincushion and needle book. The instructions and illustrations are clear enough, though, that even projects that seem more intimidating, like the full-fledged messenger bag with pockets and a laptop compartment, are easy to follow.


In contrast to many sewing craft books that focus on one material (felt, scraps of quilting cottons, upcycled fabrics), authors Barden and Smitke challenge sewists to explore working with a variety of materials. Projects make the most of selvages, wool felt, linen, canvas, interfacing, fusible fleece, and zippers.

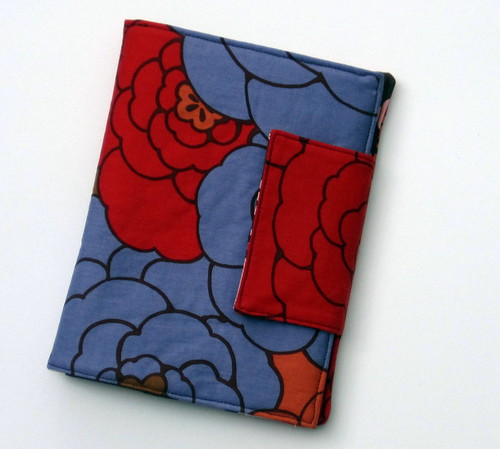
When I was studying the 22 projects in Everyday Handmade and trying to decide which one to make, the Literary Genius e-Reader Cover caught my attention. I received a Kindle as a birthday gift only a week after I won this book at a quilting retreat, so the timing was perfect. Before I started, I noticed that the finished size (5 1/2” by 8 1/2") was going to be bigger than my Kindle and therefore wouldn’t provide the intended protection. The authors note in the project instructions that they have included measurements for two e-readers, but unfortunately both were bigger than mine, so I decided to reduce the cutting measurements and make a practice cover first to check the sizing.
practice #1 -- Kindle would easily fall out
Fast forward through recalculations and two practice covers and I was finally ready to proceed with my final fabric choices. I used interfacing on all my quilting cottons to give them a bit more heft, and at the last minute I decided to also supplement the outer layer of the cover with fusible fleece to better protect my Kindle. I’m happy with how the final product turned out. Although there are slight changes I would make if I were to make this again, it holds my Kindle snugly and provides sufficient protection.

practice #2 -- Better, but Kindle still isn't tight in the top corners
Since I did have to do a lot of recalculating and make two practice covers before I settled on the proper measurements for my Kindle model, I’d be remiss if I didn’t note my disappointment that this particular project did not include formulas for adapting the measurements for any model of e-reader. In the end I was able to make the cover I wanted, but formulas for getting the right measurements would have made the project faster and less frustrating.


Success!


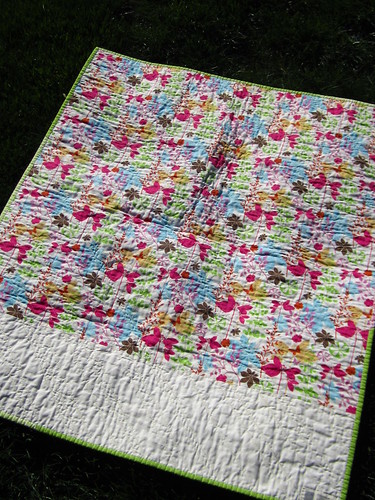
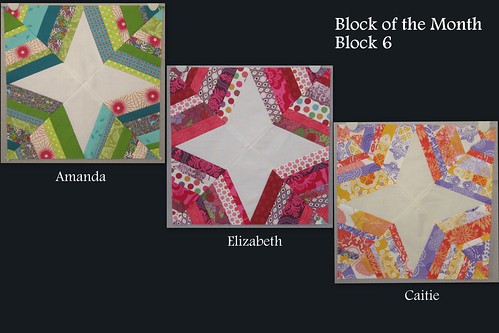
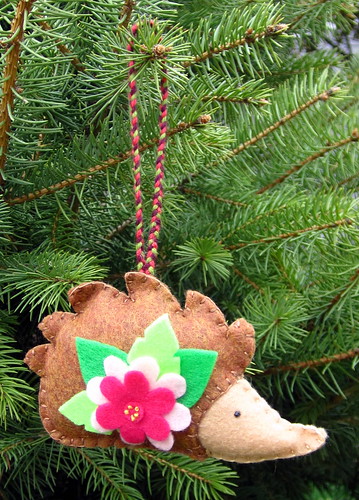
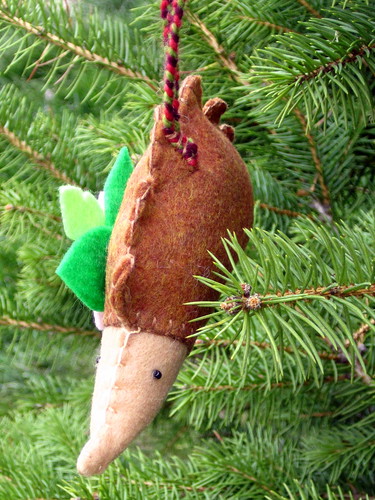
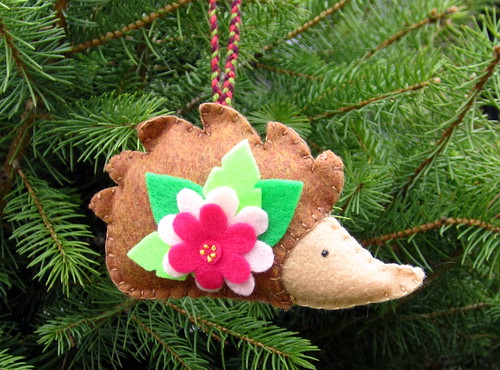
One other project that I tried from Everyday Handmade is the Petunia Hedgehog Pincushion. Petunia is part of a three-piece sewing set, along with a stump-shaped needle book and notions pouch. To satisfy this month's Woodlands theme for the ornament challenge, I turned Petunia into a soft ornament by simply eliminating the base and sewing both sides of the body together all the way around. Templates are included for the tree stump parts as well as all Petunia’s parts, and I found it very easy to trace them using freezer paper and then transfer and cut the shapes out of craft felt. At the back of the book Barden and Smitke include simple instructions for techniques used in the projects, including the French knots and blanket stitch on Petunia. Even when you know how to execute simple embroidery like this, if your memory is anything like mine you know it’s helpful to have a refresher on hand.
April ornament: Hedgehog

I’m pleased with the range of projects in Everyday Handmade, and I like the look and feel of Barden’s and Smitke’s designs. Whether you’re making a little something for yourself or sewing up a personalized gift for a friend, you’ll find something to try in Everyday Handmade.

April 26, 2012

Big Finish: Wonky Star Baby Quilt

Wonky Star baby quilt

A friend asked me to make a baby quilt for her expectant college roommate.  We talked a little about size and colors, and I brought in a variety of fabrics from my stash for her to sift through and pick out some favorites.  And that was it.
Left to choose the design and work out the details myself, I kept coming back to the Sparkle Punch Quilt-Along that one of my favorite quilt bloggers, Oh Fransson!, had started up not long before this quilt assignment came to me.  I'd admired the nestled wonky stars when the design previously appeared in this pillow cover, and when the quilt-along started I put it on my Quilts To-Make list for 2012 (yes, such a list does exist -- don't laugh).  So the wonky stars aligned and I decided to make a Sparkle Punch/wonky star baby quilt, with Oh Fransson's quilt-along as a rough guide.
I used Kona Maize from my fabric stash and selected a variety of pink and green prints for the stars.  The binding is a mix of green print strips that I had a from a knockoff jelly roll that matched perfectly.
Wonky Star baby quilt

Wonky Star baby quiltThe back is a floral print from Hobby Lobby, with a stripe of Kona Bone at the bottom.  I chose to quilt this in diagonal straight lines going in only one direction; the spacing is varied, with no rhyme or reason.  Also, this is the first quilt that got one of my tags that Jen gave me for my birthday -- I was so excited to stitch that on at the end!


April 25, 2012

Kindle Cover and a Guest Post at Craft Buds

Kindle cover
open (snug as a bug in a rug)
Hi there! I'm guest posting today at Craft Buds, sharing a review of the book Everyday Handmade: 22 Practical Projects for the Modern Sewist by Cassie Barden and Adrienne Smitke (Martingale).  Pop over there to check out everything Craft Buds has to offer (and it offers a lot!) and to read about my handmade Kindle cover, which is a pattern in the book.  There's also a giveaway, so get moving!

Kindle cover
and closed

April 23, 2012

Block of the Month Project: Block #6

Block of the Month, Block 6

I was happy to see this spiderweb block show up as one of our April assignments for the Craftsy Block of the Month series.  I'd seen them on other quilting blogs, and although my head knew that they weren't impossible, my confidence wasn't so sure.  Turns out they're easy!  And they look pretty impressive, which is a nice bonus.  I see more spiderweb blocks in my future, for sure.

Block #1, click here.
Block #2, click here.
Block #3, click here.
Block #4, click here.
Block #5, click here.

April 22, 2012

DIY Baby Bibs

It all started when my (talented) Aunt Pam sent me two adorable bibs for the little G. I had to figure out how to replicate them because, frankly, I needed a break from burp cloths and these were a little different but still really practical.  Plus you can never have too many bibs on hand, right?


Baby Bib Instructions
  1. Purchase .25 yards each of chenille and a fabric of your choice, along with a pack of pearl snaps.  (This is also a great way to use up smaller pieces of fabric in your scrap pile.)
  2. Use a bib you have or one purchased from a consignment store as a pattern. Trace around it onto newspaper (or whatever you have on hand), adding 1/4" to the edge for your seam allowance.
  3. Pin the chenille to your "front" fabric as the bib will appear when assembled, and cut out your pieces using the pattern. Pinning the layers before you cut them out will keep you from accidentally reversing your fabrics before assembly.
  4. Pin the 2 bib pieces, right sides together, and sew around them with a straight stitch, using a 1/4" seam and leaving a 2" opening.
  5. Turn your bib right-side out through the opening.  Tuck in the seam allowance at the opening, pin, and handstitch it closed.
  6. Add your snap to the bib per the package instructions, and you're done.

April 21, 2012

Block of the Month Project: Block #5

Block of the Month, Block 5

The Craftsy Block of the Month project continues.  April brought us string piecing techniques, and I have to say that the two blocks this month might be my favorites.  I've made one other string block like this one, although the technique used here was different -- the instructions had us sew each strip onto a foundation square.  The four foundation squares are sewn together at the end to create the block.  Although the foundation means that the finished block has more weight than one in which you sew the strips to foundation or freezer paper, I wouldn't rule out using it again for a string quilt in the future.

To see Block #1, click here.
To see Block #2, click here.
To see Block #3, click here.
To see Block #4, click here.

April 16, 2012

Bright and Cheery Yo-Yo Barrette


This is one of my first attempts at hair accessories, so be kind. But everyone has to start somewhere, and I thought "Matching barrettes run a small fortune and honestly, why can't I just make them for each of little G's outfits?"

Easy Yo-Yo Barrette Instructions
  1. Buy a pack of ribbon covered barrettes for the base. I found these at Hobby Lobby and you can't beat 12 for $4.99 (less if you use your 40% off mobile coupon).
  2. Trace a fabric circle. I use a grosgrain ribbon spool as a template. Cut it out for your circle.

  3. Fold over the edges of the fabric circle about 1/4 inch to hide the raw edges, and baste stitch around the entire circle.
  4. Pull the thread to cinch up your circle, creating your yo-yo flower base. Knot your thread and iron the yo-yo flat.

  5. Sew a cute button into the circle of your flower to hide the gathered center.

  6. Cut a 2-inch piece of grosgrain ribbon, angling the ends for a finished look. Cinch it in the middle and stitch to create a bow.

  7. Hot glue the ribbon bow onto your covered barrette, and then hot glue the flower onto the bow.
  8. Let dry and admire your custom barrette. 
 

April 15, 2012

April Ornament: Hedgehog

April ornament: Hedgehog

This month's ornament theme -- woodlands -- and this little hedgehog may be my favorite of the year, and it's only April!  I wish I could take credit for this critter, but the pattern and templates are courtesy Everyday Handmade: 22 Practical Projects for the Modern Sewist by Cassie Barden and Adrienne Smitke, which I won at the Indy Modern Quilt Guild retreat back in March.  In the book, the hedgehog's name is Petunia and she's intended to be a pincushion, so I made a few alterations to turn her into an ornament -- I eliminated the flat bottom piece and added a hanging loop to the back.  (The loop is simply 3 strands of wool yarn that I had on hand, braided together.  I like the added interest of a multicolored hanger -- definitely something to try again on another ornament.)

April ornament: Hedgehog

April ornament: Hedgehog

April 12, 2012

Hair Barrettes from the Scrap Pile


I've been making a lot of toddler dresses as of late, thanks to Pinterest and all the easy tutorials right at my fingertips. One result of all this dressmaking has been lots of scraps around my sewing space that I need to do something with. So, I went looking for some ideas and found this flower tutorial on Lillyella. I found the additional steps to be a little too involved for me, so I came up with a simple version that I think turned out quite well.

Scrap Flower Barrettes
  1. Start with ribbon-covered hair clips. I purchased ribbon-covered clips for less than $5 a bag at Hobby Lobby. Buy the covered barrettes and save yourself some time hot gluing grosgrain ribbon...trust me.
  2. Pick a fabric scrap that's 12 inches long and 1 to 2 inches wide.
  3. Heat up your hot glue gun.
  4. Fold one end of the fabric scrap like an accordion to establish the center of the flower, and then start wrapping the scrap around that center.
  5. Continue wrapping the scrap around itself, twisting it at times to vary the shape. Hold on to it in the center and keep it tight the entire time or it will unroll.
  6. When you're left with a tail that's around 3/4 inch, fold the tail and hot glue it to the bottom of the flower to create a base. This secures the flower roll and gives you a base for attaching the flower to the barrette.  Let the hot glue dry.
  7. Put some glue on the top of the barrette and then add the flower.
  8. Carefully check to make sure you can open and close the barrette and the glue hasn't leaked anywhere it shouldn't have.

April 8, 2012

Big Finish: Summer House Baby Quilt

Summer House Baby Quilt

Back in November I posted about this baby quilt I was in the process of making for a friend from college. I used Moda's Summer House line and the Moda Bakeshop pattern "Baby Lattice Quilt" from Amy Smart of www.diaryofaquilter.com.

Summer House Baby Quilt

I finished the quilt in January (that explains my snowy photo shoot) and mailed it off to be given to little Molly Corrine on the occasion of her baptism. Lindsay of ellesquare was kind enough to do a little personalized embroidery requested by Molly's godmother.


My favorite part of this quilt may be the fabric on the back.  The off-white background balances all the color action happening on the front, and the hot pink binding pulls both sides together.

Summer House Baby Quilt

Cute baby, cute quilt.  It's nice when things work out that way.


April 7, 2012

Cookie Nests: Last Minute Easter Dessert Idea


A co-worker's wife made these Cookie Nests and I have been craving another all week. If you would like a bite-sized bit of cookie deliciousness, give them a try.

1. Make basic chocolate chip cookie dough, without the chocolate chips.
2. Scoop and shape into a small muffin tin.
3. Bake as directed or until they are done in the middle. Finished cookie should be about 1 inch or so in height.
4. While the cookies are baking, combine vanilla icing with shredded coconut and a few drops of yellow food coloring and mix until the color is consistent.
5. Once the cookies are out of the tins and cooled, top them with the coconut frosting.
6. Nestle in a chocolate egg on top

You can also make smaller batches of the icing and coconut in other colors, but I'm partial to the yellow!

April 6, 2012

March Ornament: Shamrock


I was stuck on the Shamrock idea for my March ornament (yes, I know I'm tardy, but it's the thought that counts!). I could not for the life of me get a stuffed shamrock that holds a photo to work. I tried 5 times but I know failure when I see it. So, I decided to surf Pinterest for awhile and low and behold, a Shamrock... and it is so easy!

I'm not sure who this person is exactly that created the shamrock, but he/she goes by "Owl" on Flickr.

If you would like to make your own shamrock, or string of them for next St. Patrick's Day, I couldn't recommend an easier tutorial!

April 5, 2012

Block of the Month Project: Block #4

Block of the Month, Block 4


The Craftsy Block of the Month project continues, and Amanda, Caitie, and I press on and try to keep up!  The second block for February is this large chevron, created with some artful placement of half-square triangles and solid squares.  This block is one of my favorites so far.

To see Block #1, click here.
To see Block #2, click here.
To see Block #3, click here.

April 2, 2012

Woodland: 12 Months of Ornaments {April Theme}


The 1st of April has come and gone, so it's time to share a new ornament theme for the 12 Months of Ornaments project.  For the woodland theme, we're thinking flora and fauna -- anything you might find in or scampering around the woods this time of year, when everything's perking up after winter.

Jen and I will get to work on our ornaments, and we'd love for more of our friends to join in as well.  Just post a picture of your ornament in our flickr pool here.

LinkWithin

Related Posts Plugin for WordPress, Blogger...