December 18, 2011

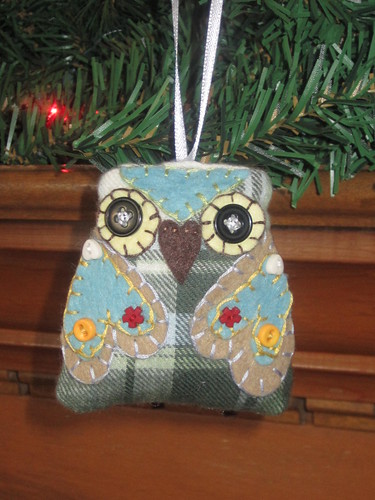
Owl Ornament (inspired by Crate & Barrel)

I like Crate & Barrel, and they returned that affection this year by sending me what seems like 50 holiday catalogs. I keep flipping through them, thinking that there might be something in this one or that one that I haven't admired yet (there isn't). After repeatedly stopping on these button owl ornaments, I came to the conclusion that I could make them myself.  So I did.  Well, one at least.

Scrappy owl ornament

This little guy is modeled on the one in the center of the C&B trio.  I used the snipping tool on my computer to clip that picture, and when I printed it the owls were enlarged, which worked for my purposes.  I made templates from the printout, traced them onto some plaid flannel and wool felt, and added a few buttons and some blanket stitching.  I think the resemblance is pretty decent.

I made this ornament for the IMQG handmade ornament exchange and was so happy when it went to my friend and colleague Lindsay, who blogs at ellesquare (and sells at http://www.etsy.com/shop/cosmicthimble -- you're welcome LL). The great thing about exchanging handmade ornaments with crafty people is that you know they appreciate the time spent on your creation!

December 17, 2011

Sending Christmas Cheer with Iris Folded Cards

Iris paper folding

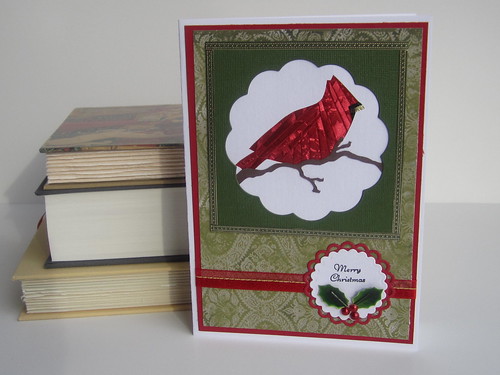
A little while back my friend Susannah sent me info on an iris paper folding/card class at a branch of the library nearby and asked, "Do we want to try this?" We hadn't heard of this iris folding before, but the notice said we'd make 2 holiday cards and the fee was nominal, so we decided to give it a go.

Iris paper folding

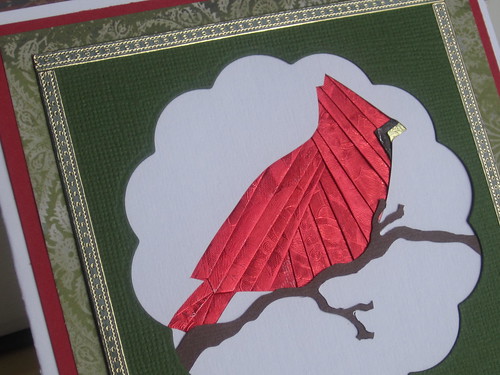
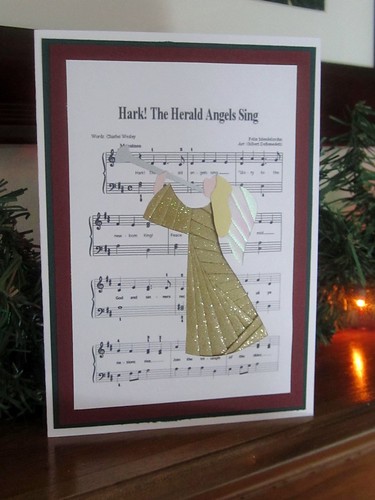
Although we skewed the average age of class attendants considerably, it was fun to learn a new craft -- especially one that looks far more complicated and difficult than it really is. (Isn't that the best kind?) Instructor Susie Fintz guided us through the cardinal first, and it was a rousing success if I say so myself. Susannah and I had to leave early, so we took the kits for the angel cards home and I made this one on my own. (That's why it's lacking some of the fancy sticker bling that the cardinal has, but I think it still looks nice.)

Iris paper folding

The cardinal went to my parents and the angel to my co-blogger/sister Jen and her husband. I've heard rumors that the cardinal will be framed to be enjoyed every Christmas. (Glad you like it Mom!)

December 3, 2011

Sewing Project: Zipper Pouches with Pleats

First zipper pouch

A while back I found a tutorial for a simple, small zipper pouch with a few pleats for interest. I filed it away with all the other tutorials I stumble upon that make me think "Oh! I have to make that!" -- a thought that quickly leads to "And I can make a whole bunch of them and give them as gifts!"  I'm misguidedly eager and ambitious when it comes to crafts, and usually I end up just turning out one supposedly amazing item before I either a) lose interest, or b) realize this supposedly amazing item is way more trouble than it's worth due to difficulty or poor instructions.  So this is an exception worth mentioning.
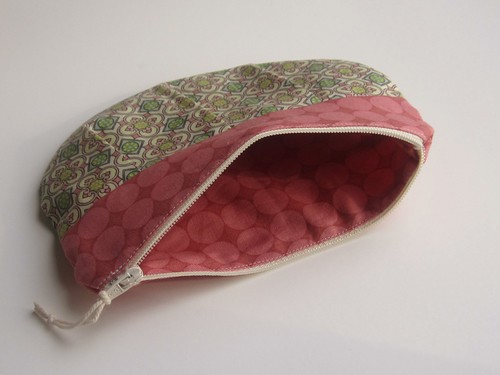
peek inside

I made this rosy pouch to send to my sister for her birthday, along with some new crochet books to help her expand her menagerie.  It requires a small amount of fabric and a 7-inch zipper -- I have plenty of fabric, so the investment is only around $2 for the zipper and some time.  Aaaaand that's what led me to this:
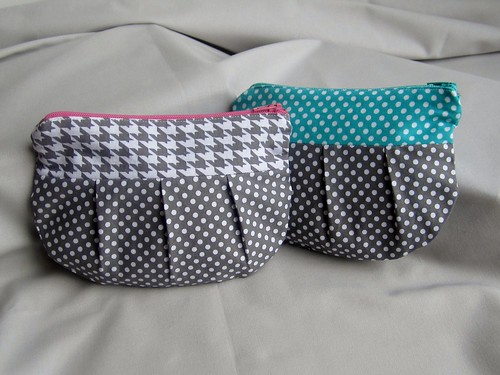
Zipper pouches

One of these pouches will go to a holiday auction and the other may make its way into a Christmas gift.  The one on the left is lined in the grey dot, and the one on the right is lined in the turquoise dot.  I made these last night, and after struggling with the turquoise one, I finished it and whipped out the grey one in record time, so I guess practice makes perfect.
After making 3 pouches, I still have some issues with the design/tutorial, but it's unlikely anyone else would notice the flaws I see.  And so I may make more...or I may move on to the next greatest tutorial ever -- and make a bunch to give as gifts!

November 20, 2011

Love this ... Rag Quilt for Baby

Both Elizabeth and I have made these rag quilts for friends in the past and received rave reviews. Elizabeth originally sent me the link to Beverly's, where you can get the instructions, but I've embedded the instructions here for you. The best thing about this quilt -- other than how easy it is -- is how much fun you can have picking out fabrics. I've turned these quilts into my go-to projects for rainy days because it does take quite awhile to cut all the squares of flannel and batting. I would recommend the Warm and Natural® batting just because it doesn't feel plasticy when you're working with it. I haven't had any trouble with it shifting around and it's actually quite affordable at JoAnn's when you keep an eye out for the combination of "on sale" and coupons.


As for colors, the video example uses a fabric collection, however in my town, finding a full collection of compatible flannels is fairly impossible without spending a mint to order online. What I've done is gone a little outside and made the fabric choices my own, with my own rules. I will usually find a print I really like (note the aliens) and then look for a polka dot, stripe, small print or plaid in the same color family. My quilts end up a little more colorful (mostly because I'm not a baby blue and pink kinda person).

Would love to see your versions of this, post them to our flickr site to share.

November 14, 2011

Self-zipping Coin Purse

Self-zipping coin purse

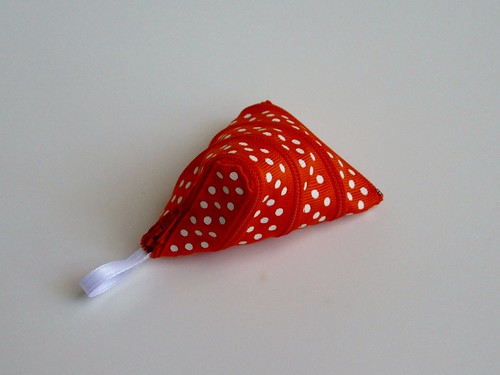
While browsing a favorite blog, How About Orange, I saw this post about a self-zipping coin purse.  The project originates in this tutorial from Craft Passion, and those are the instructions I used.  I'm not sure what made me think I could actually create this geometric wonder -- it even looks complicated in the tutorial, and those folks knew what they were doing! -- but once I made up my mind, I was off to buy a zipper and coordinating ribbon.  (My purse went unlined -- after a few attempts at hand-sewing lining along the ribbon on the inside, I wasn't happy with the results and I couldn't keep the lining from interfering with the zipper action.)  Unfortunately, I forgot to get a picture of the purse unzipped, but trust me, it does unzip all the way around and around and around.

I bought a pair of earrings at a local Fair Trade shop and tucked them inside this little purse to send to a friend in Texas for her birthday.

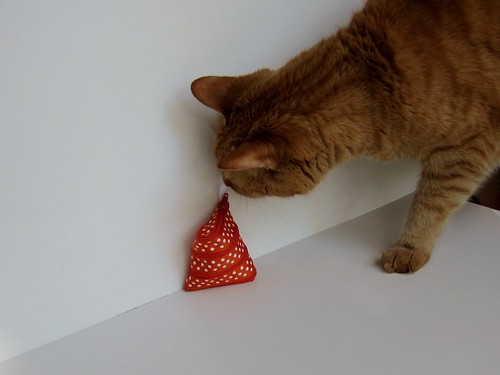
(Admittedly, I didn't discourage Jack's curiosity during my little photo shoot. I needed something to show scale, so why not the cat?)
Curious cat

November 13, 2011

DIY Project: Extra marble tile transformed into coaster

As I've mentioned in previous posts, I like to reuse items in new ways especially when it saves money. A couple of years ago when we moved into our house we splurged on some Pier 1 wooden coasters which started to warp from the moisture within six months. Not really wanting to purchase new ones I started keeping an eye out and realized we had leftover marble tiles from the installation of our backsplash.


Our tile installers had purchased 12" tiles and cut them into quarters as "decorative" elements on the backsplash and they match our countertop so it looks lovely and better than just plain large tiles. Apparently they had cut an extra tile because I found four leftover squares on a dusty garage shelf. I cleaned each tile and then added clear scuff protectors to each corner to protect the tabletops.

I think you could easily do this at home if you had a spare tile and a tile cutter, or a neighbor who has a tile cutter. The great thing about marble is that it absorbs moisture and I haven't had any rings or moisture marks on the furniture. The scuff protectors run about $2 a packet at Home Depot and are made to protect walls from picture frames.

I think these would be great housewarming gifts or raffle items in a gift basket with some glasses. I may have to go root around in the garage and see if I could find a few more...always good to think about these items when you've got Thanksgiving guests planned.

November 6, 2011

Summer House Baby Quilt (in progress)

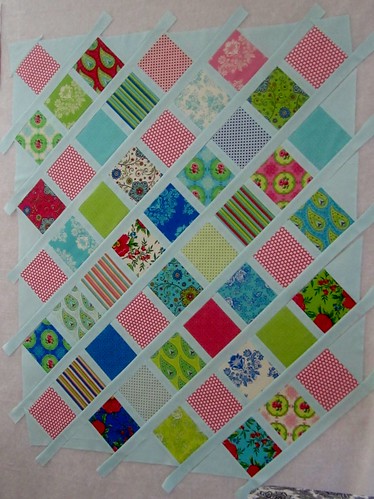
Summer House baby quilt in progress

I've been sewing like crazy trying to finish two quilts intended for Christmas gifts, but when a friend asked me to make a baby quilt that she could give as a gift, I couldn't say no.  We've been working out all the details via email -- I sent her some possible patterns and a link to see a fabric charm pack that I already had and didn't have a particular plan for.  Luckily, she loved the fabric and picked a pattern that will highlight the bright florals, stripes, and dots in Moda's Summer House line. The photo above shows my progress after a couple of hours of work yesterday.  My "client" asked to have the baby's name embroidered on the front, so that will go in the bottom right corner.

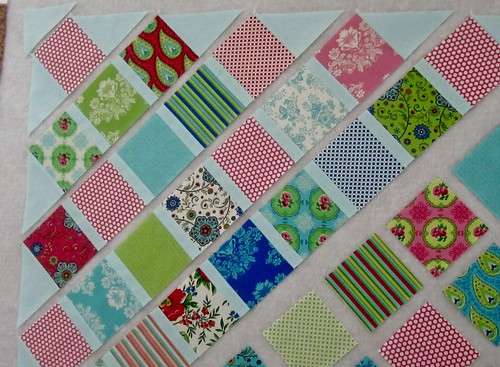
Working backwards, the photo below shows the quilt top during the first round of assembly, as I sewed the vertical sashing strips between each print block. I was happy to find Summer House yardage at one of my local quilt shops, saving me an online order and shipping charges in order to buy fabric for the backing and binding, and the ladies at the shop helped me select the light aqua and white dot for the sashing. I was hoping that I wouldn't have to settle for a plain off-white solid for the sashing, and the aqua is a perfect fit.  (It's a little hard to see the aqua in these photos -- I'll try for a better photo next time.)

Summer House baby quilt

LinkWithin

Related Posts Plugin for WordPress, Blogger...