March 8, 2012
DIY Custom Shelf for the Nursery
I was looking for a shelf to place above the changing table that could hold 2 very important items: the baby monitor (it's a video monitor, so we need it above the crib) and toys to hand our little girl to distract her while changing. I found this shelf at Pottery Barn Kids that was perfect but out of my price range...way out.
So I decided to make my own custom red shelf with help from my local craft store and about $35 worth of supplies. Here's how I did it -- and how you can do it too:
1. Stroll through the wood materials section at your local craft store and pick out a shelf. (If your craft store is JoAnn's, use one of the neverending 40% off coupons that you surely get via snail-mail or email to make it an even better deal.)
2. Remove the hardware and sand the shelf all over with sandpaper. This step is not fun but very necessary to ensure that no one ever gets a splinter, and a well-sanded finish will give you better results with the paint job.
3. Spray with your choice of colored spray paint. You will notice that I took the shelf out and laid it in the yard for painting. I've found this is the best way to minimize cleanup -- just mow the grass to get rid of the overspray. This method also saves me from peeling off newspaper stuck to the shelf, which is not pleasant and requires more sanding.
4. After applying one coat and letting the paint dry thoroughly, sand the shelf again and then wipe with a damp washcloth or tack cloth to remove the dust. Allow the shelf to dry if you used a damp washcloth. (I didn't have a tack cloth and going to the store just wasn't on the list that day, so I let it dry outside.)
5. Apply a second coat of spray paint, and let it dry. The secret to spray paint is several light layers. Fight the desire to lay on a thick coat -- it will just run and make a mess.
6. Apply coat #3, and let the paint dry for a couple of hours.
7. Apply coat #4, and -- you guessed it -- let it dry for a few more hours. (Isn't this fun?)
8. Apply another coat of paint if you're not satisfied with the finish, but if you're happy with it after 4 coats, let it dry overnight.
9. Reattach the hardware, hang on the wall, and decorate!
March 6, 2012
Luck: 12 Months of Ornaments
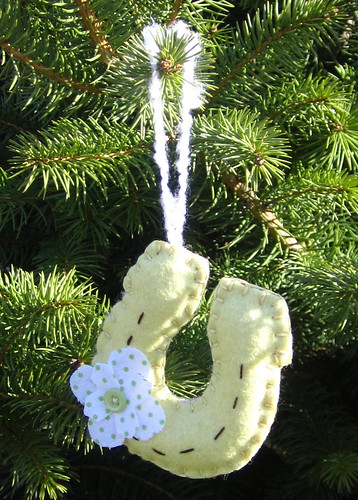
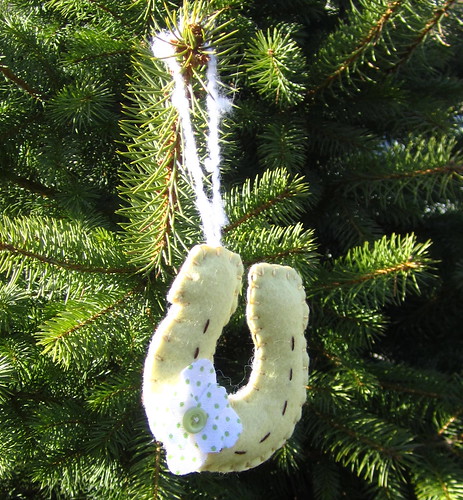
For my March ornament, I made this pale yellow horseshoe. I found a basic horseshoe shape online and used it as my template. The front is a pale yellow wool felt, and the back is dark brown felt. I used scraps of flannel with pale green polka dots to craft a simple two-layer flower with a green button accent. A bit of yellow and brown embroidery floss hold it together and add a little extra interest, and it hangs from a scrap of white boucle yarn.

In all honesty, I wasn't sure what I was doing when I started this ornament and didn't know if it would turn out well, so I didn't take any pictures of the process. (So sad, I know.) But check back later this month for a simple tutorial for making a lucky horseshoe of your own!
March 3, 2012
Favorite Things: Zutano at Hobby Lobby
You can imagine my surprise when this cute little plate caught my eye at Hobby Lobby last week. There were 2 plates stacked on a multi-tiered display so I picked it up to check the price and when I flipped it over I saw that it was from Zutano! If you are familiar with the Zutano brand, you know that their children's clothes are adorable...and expensive. This plate is an inexpensive way to enjoy their cheery designs (love the owls!) without spending a mint. So, if you're out an about and looking for a cute baby shower gift under $5, try Hobby Lobby.
March 1, 2012
Luck: 12 Months of Ornaments {March Theme}
May your pockets be heavy and your heart be light.
May good luck pursue you each morning and night.
Today is the first day of March, so we're kicking off our third installment of the 12 Months of Ornaments Challenge. This month's theme is...
~LUCK~
Jen and I will get to work on our ornaments, and we'd love for more of our friends to join in as well. Just post a picture of your ornament in our flickr pool here.
February 29, 2012
String Blocks for Heroes Charity Quilt
Last fall one of my fellow bloggers and members of the Indy Modern Quilt Guild put out a call for help making string blocks for a quilt she wanted to donate to an auction benefiting the Heroes Foundation, which funds the development of cancer outreach programs promoting survivorship and supports the cancer community. I saw Val's message at PinkPlease! and knew I could help out (and make my first string block, which I'd been wanting to do anyway!). I also thought it would be a great beginner project for me to help a friend break in her new/used sewing machine.
Here are our blocks -- mine is on the top, my friend's is on the bottom:
Yes, they look a little scrappy and crazy on their own, but Val combined our two little masterpieces with blocks from 45 other women, and check out the final quilt (photos from Val):
As if this beautiful quilt weren't enough, the Heroes Foundation auction was held last weekend and the quilt sold for an impressive $1000.00!!! It's pretty amazing what can happen when people come together for a great cause. Thanks Val!
Here are our blocks -- mine is on the top, my friend's is on the bottom:
Yes, they look a little scrappy and crazy on their own, but Val combined our two little masterpieces with blocks from 45 other women, and check out the final
As if this beautiful quilt weren't enough, the Heroes Foundation auction was held last weekend and the quilt sold for an impressive $1000.00!!! It's pretty amazing what can happen when people come together for a great cause. Thanks Val!
February 27, 2012
More DIY Applique Onesies
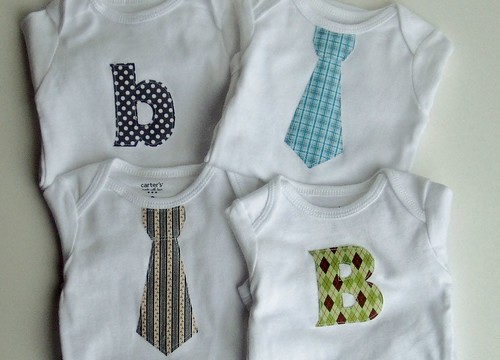
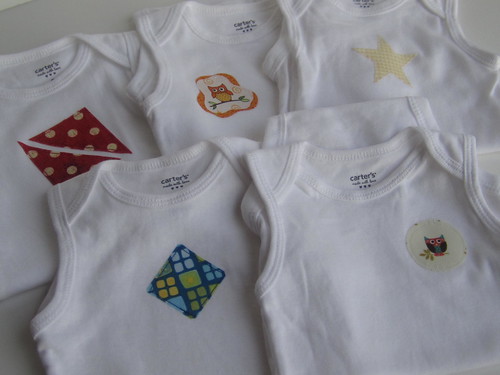
Since I first made a few applique onesies for a friend's twin girls last spring, I've found myself making more and more of these inexpensive, easy, personalized baby gifts. There was this set for Benjamin late last year:

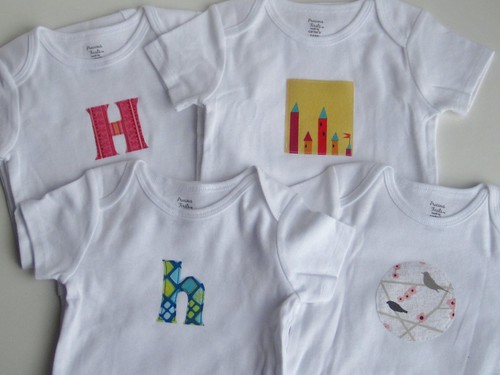
Then I stuck with the monogram idea and made this set for Hannah:

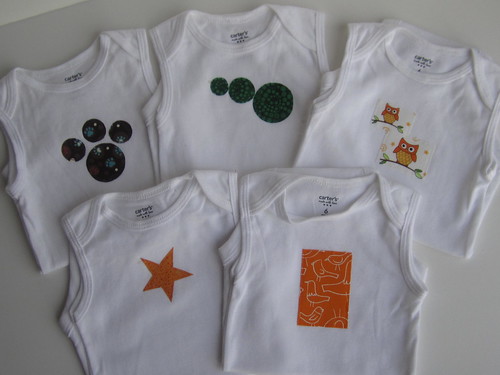
And in what felt like a grand finale (although it's not technically a finale, as I'll be making more of these in the future, I'm sure), I knocked out a set of 10 (in 2 sizes) for a first grandbaby on his/her way:


The challenge of putting appliques on 10 onesies for the same recipient was coming up with not only 10 baby-friendly fabrics but also 10 different applique shapes.

Then I stuck with the monogram idea and made this set for Hannah:

And in what felt like a grand finale (although it's not technically a finale, as I'll be making more of these in the future, I'm sure), I knocked out a set of 10 (in 2 sizes) for a first grandbaby on his/her way:


The challenge of putting appliques on 10 onesies for the same recipient was coming up with not only 10 baby-friendly fabrics but also 10 different applique shapes.
February 26, 2012
Love: 12 Months of Ornaments
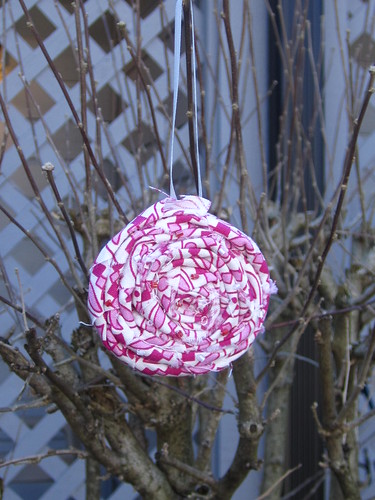
My February ornament is proof that sometimes crafts don't turn out as planned. For my "love" ornament, I imagined a shabby chic rolled flower with some sparkly beads to catch the light. Technically that's what I ended up with, but it's a little less shabby (or more shabby?) than I hoped for. Still, if the intention is to create soft ornaments for a kid-friendly tree, then at least I succeeded at that.
Lucky for me (hint, hint), March is fast approaching, and that means a fresh start and a new ornament challenge.
Subscribe to:
Posts (Atom)