April 30, 2023

Two Quick Stash-Buster Quilts

While I'm in between big projects, I've been working on some relatively quick and small quilts that use up stash fabric.


The first quilt is simple pastel patchwork that came about because the box that contains my random charm squares (5x5 inches) was too full to close. I usually cut charms and add them to the box when I have odd pieces of fabric left over from a project or if I know the prints will work for a Project Linus donation quilt at some point. So for this quilt, I pulled out all the pastels I had and cut a few more to get it to this size. The more interesting thing about this quilt is the assembly -- I used the quilt-as-you-go method of basting backing and batting together and then adding each horizontal row of already pieced squares to the top, quilting across it a few times before adding the next row of pieced squares.


The second quilt is my version of Ruby Star Society's free Moon Cake Quilt pattern. I saw this quilt when a quiltalong was announced, and the piecing stood out to me because it's graphic and has some order to it. Honestly, I saved the photo but didn't really look at the pattern -- it uses a layer cake, which I didn't realize at the time, so I may make another one eventually and actually follow the pattern! Instead, I used 5" charm squares again, pairing prints with solids. The 2x4 piecing requires 4 charms of each fabric in the pair. It was another great one for digging into my stash and finally using up some fabrics that I've had for a very long time. I'm in the process of free motion quilting it right now, with a stashed twin-size bedsheet that was perfect for the back.


Moon Cake quilt pattern


April 2, 2023

QuiltCon 2023 Workshop Projects

I'm officially 2 months behind on my goal of monthly blog posts, so I've taken a moment to be a little disappointed in myself, and now I'm going to try to catch up. First up is what would have been my February post...

My mom and I attended 2 workshops at QuiltCon 2023 in Atlanta. The first was Scrap Swap Social with Wendy Chow (@the.weekendquilter). Everyone brought scraps, which were sorted by color, and then Wendy instructed us in making a mini quilt using fusible grid interfacing. I used the grid interfacing many years ago, so I understood the basics, but Wendy shared some tips that made for a more precise completed project.


When I was selecting my scraps, I started with the abstract floral and then chose others that went with the color story. The low volume sashing and overall emphasis on peach are right in my comfort zone. I finished the 15x15 inch mini quilt top in the workshop and brought it home for quilting and binding. Now it hangs in my home office so I can admire it Monday through Friday.

The second workshop we took was Scraptacular Improv with Rossie Hutchinson (@rossiecrafts). Another scrap-focused class! Improv is not my strength or preference, but Rossie shared some strip-piecing and patchwork techniques that gave the improv process a little more structure and order.

For this workshop, we were told to bring in scraps or precuts. This is what I brought and arranged in a way that I thought was pleasing and could inform my piecing:


Not surprisingly, I leaned into peach and low volume neutrals, plus my other favorite, navy. During the workshop, I made the strawberry strip unit, navy checkerboards at the top, and green checkerboards that ended up in my finished piece:


This panel is approximately 18x32 inches. I plan to finish it and hang it on a wall in home. So that was my QuiltCon 2023 experience. Well, except for one significant souvenir...


This Juki machine replaces a secondhand BabyLock that I've had for a few years but never really loved or been that impressed with. We used these machines in Rossie's workshop, and the sale price on machines only used at QuiltCon was just too good to pass up. I look forward to logging many hours and cranking out projects (especially garments) on this new member of my Juki family (this makes 3!).


January 31, 2023

Neitherlands Quilt


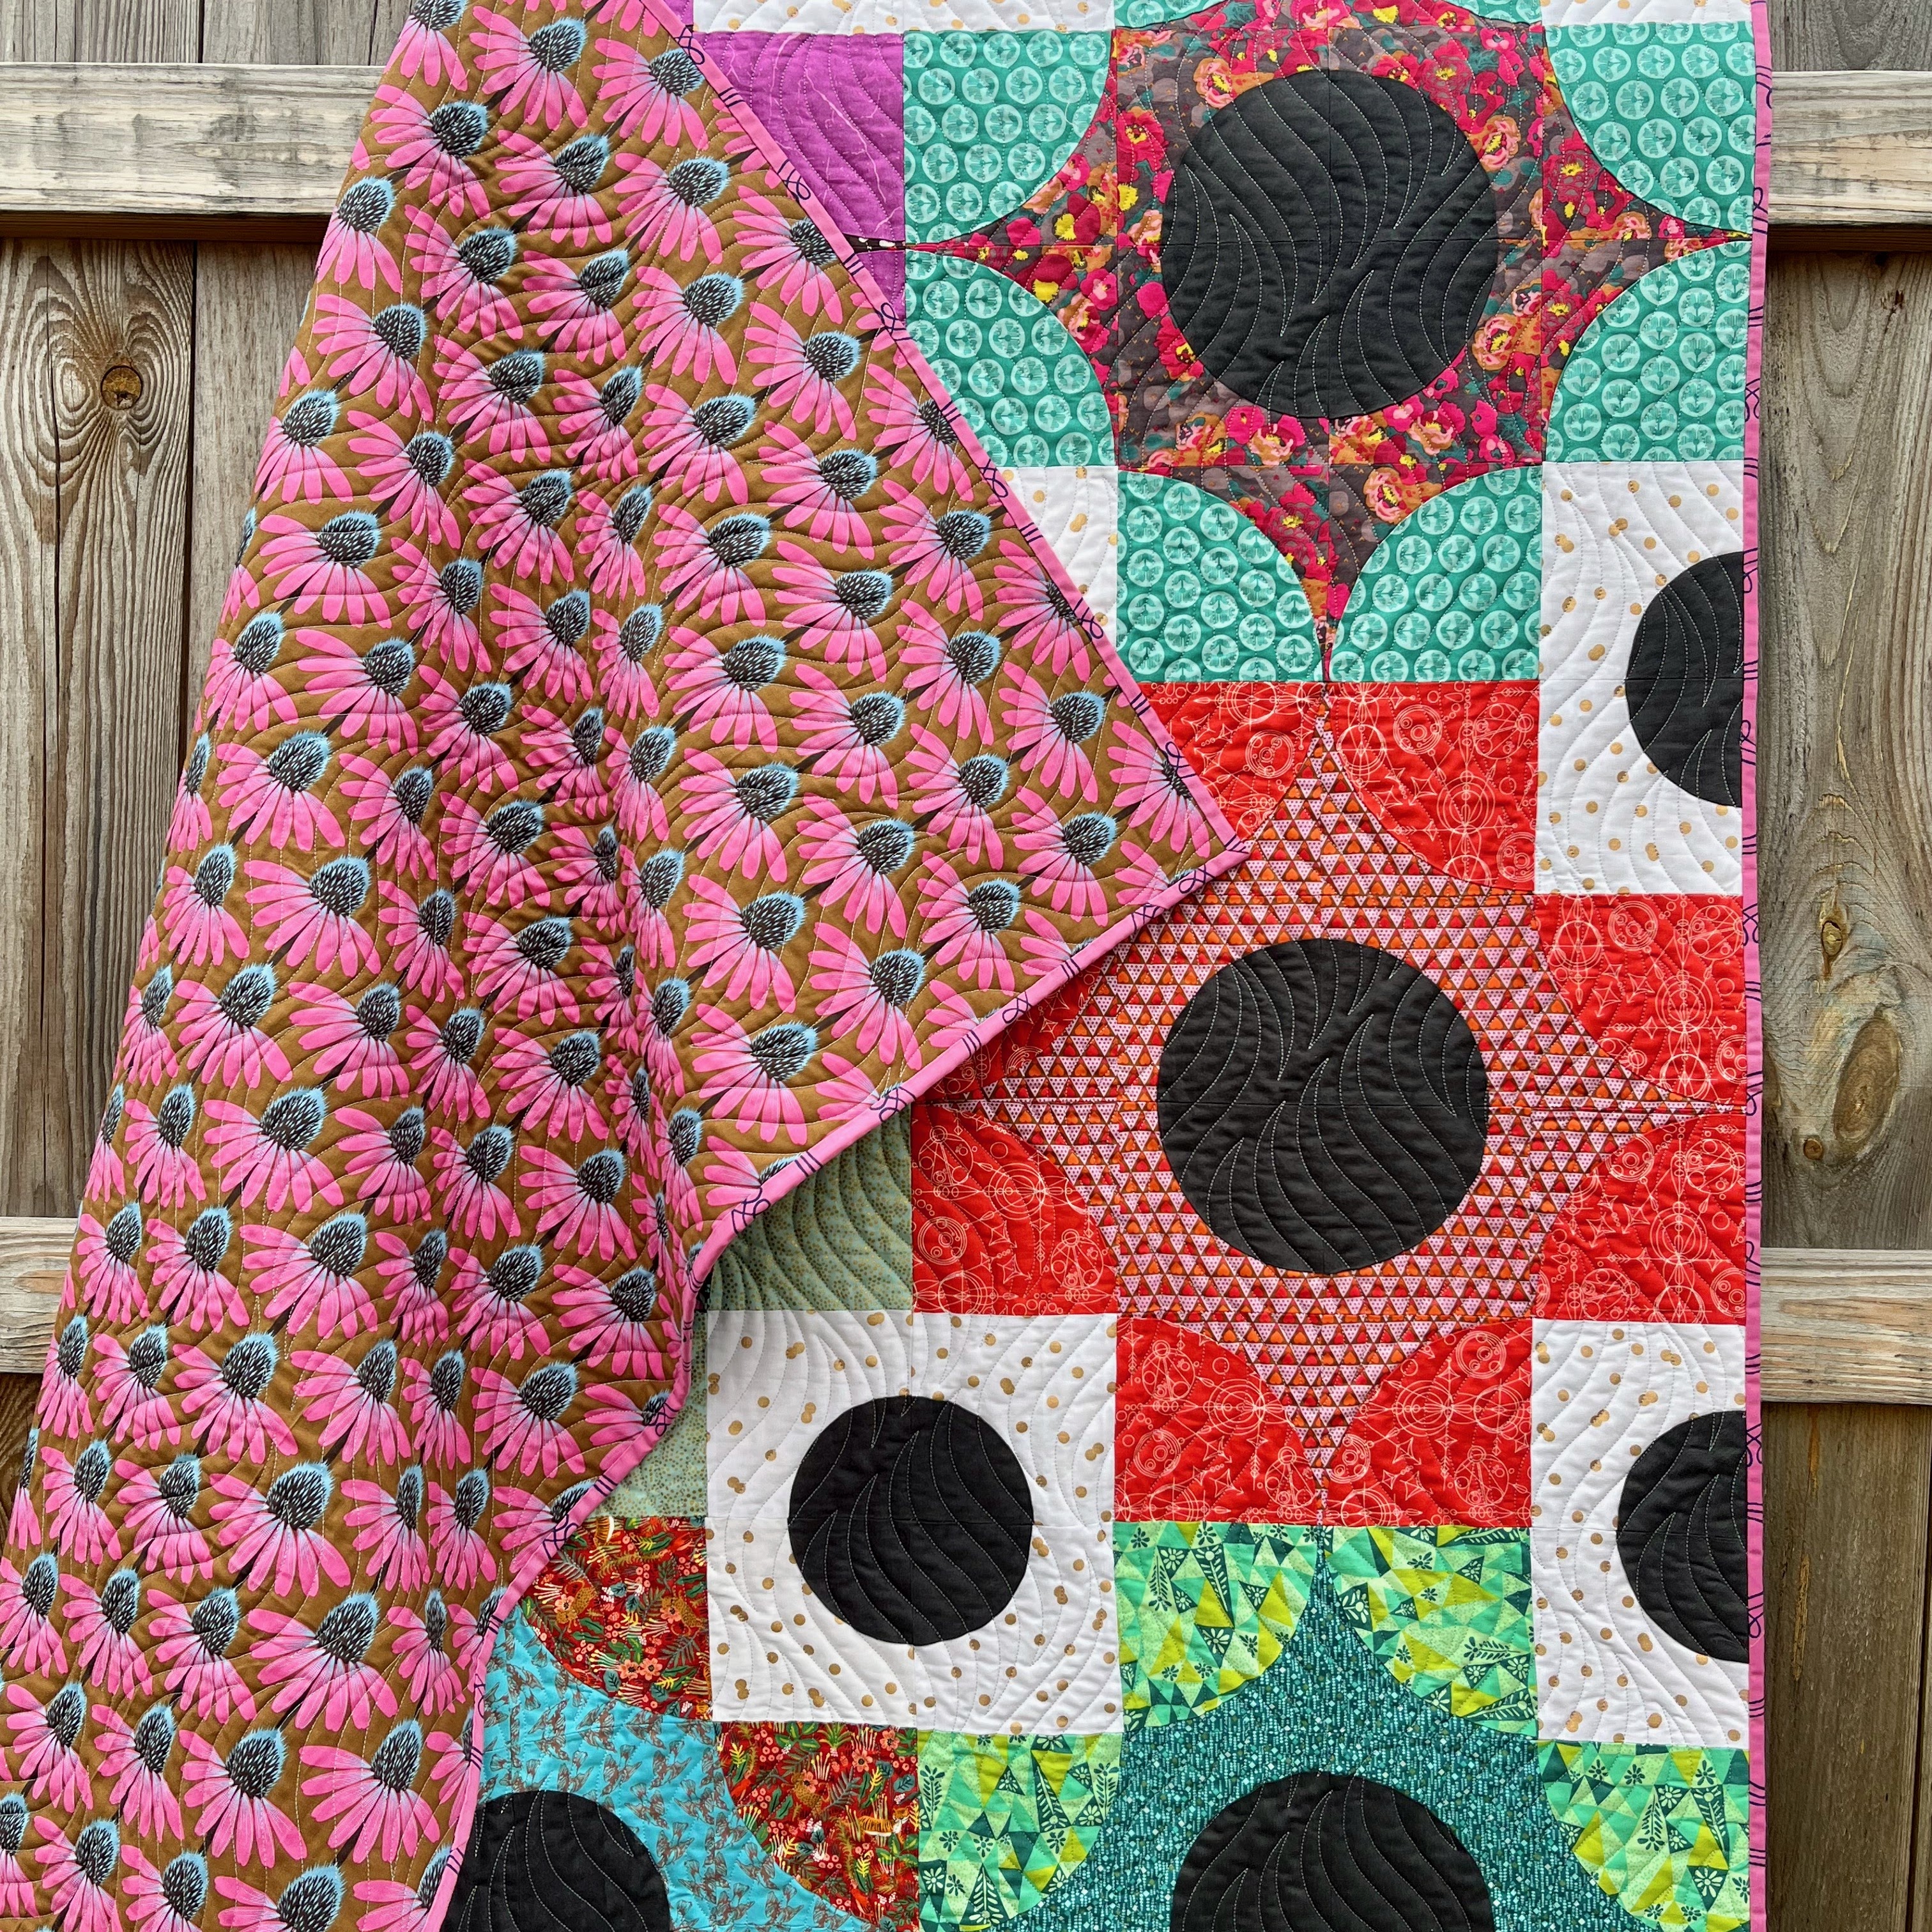
In 2019, my mom and I attended QuiltCon in Nashville and took the Mystery Quilt Workshop with Jen Carlton Bailly (aka @bettycrockerass). We got copies of two of Jen's new patterns at the time, Find Your Fade and Neitherlands, a big set of curvy templates in various sizes, and the choice of patterns to work on in the workshop. We both decided to make a Neitherlands block, and I finished one during our time with Jen. I made one more block when I returned home, but then I packed the project away and put it on a shelf ... until last fall. I pulled the project box out again, grabbed some fabric, miscut that fabric as I knew I would (the templates and pattern are a little tricky to sort out when you haven't worked on it in a while) and then found my groove.


I had a lot of fun raiding my fabric stash to find prints that would work together and still provide the contrast necessary to get the full visual effect of the curved piecing. The dark centers are Peppered Cottons, which are yarn-dyed shot cottons, so they're not quite gray and not quite black.


The three blocks that make up this pattern all have different curves, so I got a lot of practice. I love cutting curved templates, but sewing them up can be tedious, so I had to tackle these in batches. I loved the results, though, so that helped motivate me to get each block assembled.


At almost 60x60 inches, this quilt was too big for me to want to quilt on my own, so I took it to my favorite local longarmer. I don't plan to keep this quilt for myself, so I was willing to try a pantograph that's a little wilder and more unusual than what I'm usually drawn to. This is Time Warp by Urban Elementz, and I love how the quilting curves play with the pieced curves, and the lines give the quilt amazing texture.


The backing, one of Anna Maria Horner's Echinacea prints, was destashed by a guild friend of mine, and I thought it was just perfect for this quilt that's already a riot of color and print. I did some print matching along the back seam, and it turned out really well. I couldn't decide what to use for binding until I found this pink print in my stash. The lines running across it have made it difficult for me to use in other projects, so I guess it was meant to be binding!


December 31, 2022

Handmade Christmas Gifts

I didn't have a lot of time to devote to handmade gifts this holiday season, but I did manage a few. First up is a mug rug with a sweet foundation paper-pieced butterfly that I made for a mug rug swap at my quilt guild's holiday party.


The butterfly block is one of 3 free patterns from Lilyella Stitchery, her butterfly charm blocks available here. It was the perfect charm (5") size to frame out and turn into a rectangle mug rug. I did some simple walking foot quilting and was happy with the result. I thought the dark teal scrap fabric background was interesting but also set the butterfly off nicely. 

The other gifts I made for two friends took a little (a lot) longer. I learned how to knit socks in 2020, and these make pairs #5 and #6. I finished the purple pair around June and started the black and white pair in July on a road trip to Florida for a family Disney cruise. Both are made with Patons Kroy sock yarn and a go-to basic ribbed sock pattern that I found on Ravelry. I used my acrylic sock blockers for the first time and was happy with the shape they gave the socks. I'll use them again on a pair for myself and see if I notice any difference in how they fit or wear.


November 30, 2022

My Patchwork Chore Coat


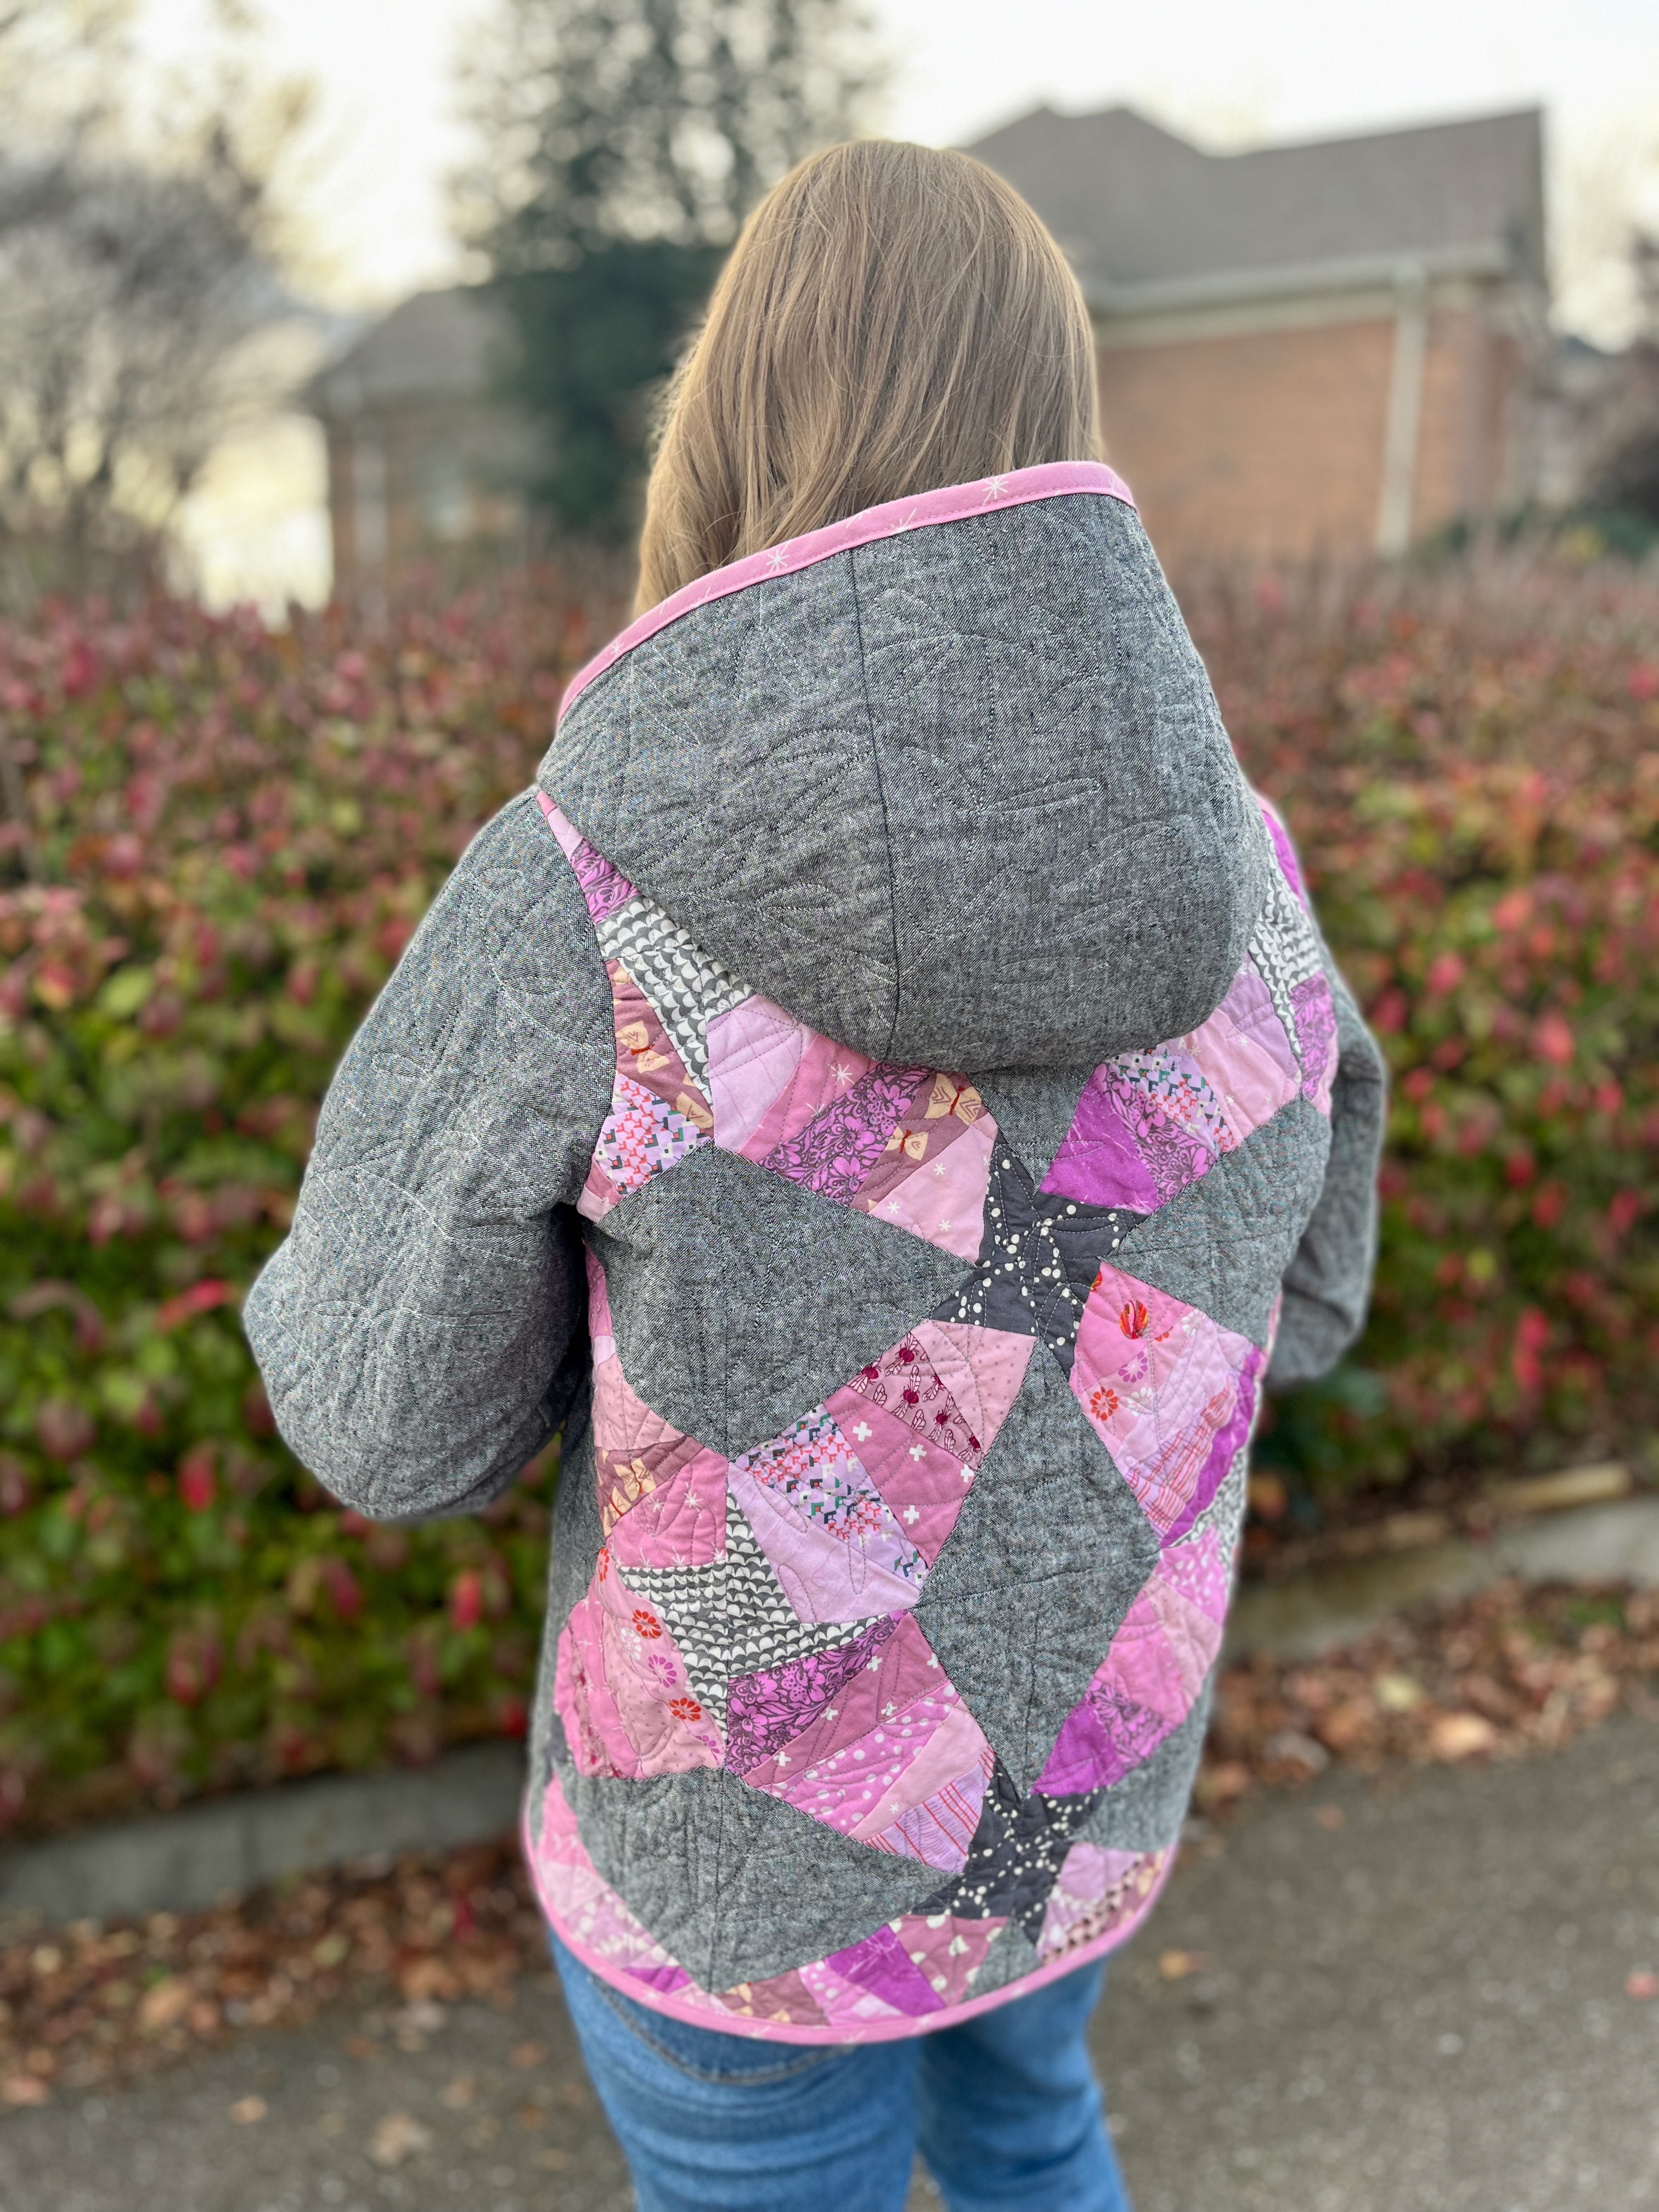
One of my sewing/quilting goals for the year was to make 3 garments, and finishing this quilt coat this fall allowed me to check that item off my list. It was definitely the most complicated garment I've ever made -- and the first time I've made buttonholes, too (not sure what I was so worried about with those). So how did I get to this finished coat?

Earlier this year, a member of my local quilt guild came to a meeting wearing a quilt coat she had recently finished. Everyone was appropriately impressed, and there was some interest in turning quilt coats into a guild program. After some discussion, we scheduled a day retreat in September where members who wanted to make themselves a quilt coat could bring their pattern and textile and sew in community -- no formal instruction, just support and encouragement to actual make the thing instead of just think about it forever.

For my coat, I chose the Patchwork & Poodles Patchwork Chore Coat pattern. Designer Eliane has created a comfortable, boxy coat pattern that I thought would be a nice casual addition to my wardrobe and a good weight for fall in East Tennessee. You can see all of her iterations here. I didn't want anything too wild for my first coat (because I might hesitate to wear something really bold, and after all the work of making it, I didn't want it to hang in the closet forever), so I decided to combine a solid body with a pieced back. Pretty quickly, I landed on Essex yarn-dyed linen in black for the body because it would be a little heavier weight than quilting cotton, neutral and easy to pair with piecing. For the back, I chose the foundation paper-pieced pattern Twinkle by Amy Friend from the book Scraps, Inc. The blocks finish at 6 inches, and I thought that scale would be a good fit for the back of my coat.


With the body fabric and piecing design in place, I pulled a few different combinations of fabrics for the back. I ended up choosing the orchid purple/pink colorway because it would complement the piecing design and be colorful without being too wild (for me).


I turned out that I had a lot more fabric in this color than I would have guessed. After I pulled it all out (more than is pictured above), I only added one more to the mix, which I ordered along with my lining fabric. I love foundation paper piecing because it's methodical and produces precise results, and I love Amy's block pattern because she does all the work of telling you what size fabric to cut for each piece in the pattern. It saves so much time and error when all the pieces are already cut to fit.

I chose dark and light gray prints for the stars/points where the blocks meet up. I pieced 25 blocks for a 5 x 5 layout, producing a panel big enough to cut out the coat back pattern piece. Even though my panel was not centered, there was enough room to center the pattern piece on it, which was a welcome surprise.

I outsourced the quilting to a local longarmer to make things quick and stress-free. I gave her essentially a mini quilt (the pieced back with floral lining) and a whole-cloth quilt (the yarn-dyed linen with floral lining). She used medium gray thread and a pantograph called Rosemary that I had seen on Instagram and loved. The delicate design looks random but has good coverage without being too dense or too loose. After I got the quilted pieces back, I washed and dried them to allow for shrinkage and then laid out the pattern pieces to make a plan before cutting. I had some seams that I wanted to avoid, so I had to be strategic.

At the retreat, I began piecing and binding my coat. I sewed the binding on by machine but then finished it by hand, so that took more time than actually assembling the coat. It definitely wasn't fun sewing some of that binding over thick seams in awkward places, but it's worth it in the end to have clean, finished seams throughout.


After the sleeves were on and bound and the front edge was bound as well, all that was left to do was add closures. I considered toggles but found some buttons that I liked, but I've never made buttonholes, and the thought of doing so on this coat -- after all the work that had gone into it --  made me nervous. So I wore it around for about a month, holding it closed, before I decided to just do the buttons already. I figured out how to make the buttonholes on my machine and did a few tests ... and then did a few more to make sure I was happy with thread and placement. I had to unpick one side of one pocket to accommodate the buttonhole (and then sew it back down afterward), but that was the only hiccup in the process. I took a deep breath before cutting the buttonholes open, too, because there's no going back!


My sister, a nonquilter who was skeptical of how a quilt coat would end up looking and how I could possibly make it cool, took these photos for me and has admitted that, yeah, it turned out pretty cool. Will I make another? Maybe. Will it be wild(er)? Possibly.

October 28, 2022

Good Morning Sunshine Pillow


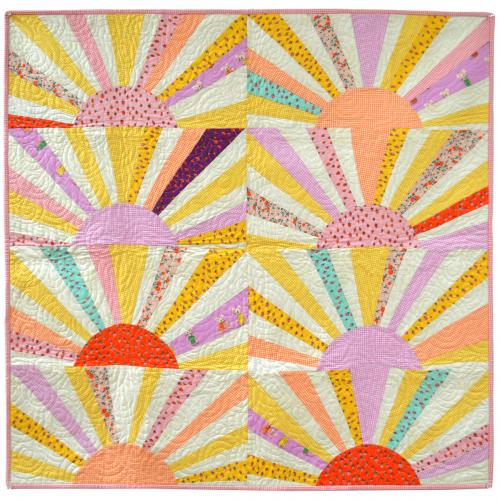
Earlier this year I converted my guest room into a full-time home office, replacing a bed that took up most of the room with an olive green velvet sleeper sofa from Edloe Finch. (The back lays down like a futon, but it looks much more like a regular sofa than the typical futon. It's firm but comfortable.) After months of it looking pretty bare, I decided to start making toss pillows for the sofa. For the first one, I used a template from the Good Morning Sunshine free quilt pattern from Heather Ross and Windham Fabrics:


I resized one sunburst template to fit a rectangle down pillow insert that I already had on hand. The toughest part was figuring out the rays -- what colors to use and in what order. I decided on a neutral background with the cutest tiny rainbows on it (from this bundle that I picked up at local Mountain Creek Quilt Shop) and a collection of solid raspberry, pink and coral scrap strips. The mustard yellow sun is also a scrap.


For the back, I pulled out a fat quarter of Tula Pink lady bugs that couldn't be a more perfect color match. I'm not sure how I got so lucky, but it pays to have a fabric stash! I also decided to put a zipper in the bottom seam in case I ever want to remove and change or wash the cover. I used this tutorial from Wren Collective and it worked like a dream.


I'm really happy with how this pillow turned out, and it looks so nice on the sofa every time I enter my home office. Now I'm brainstorming other pillows to add and considering a knitted or crocheted one to add some texture. I'm sure there will be more quilted pillows, too!

September 30, 2022

Works in Progress


This month I decided to put together a snapshot of my current quilting and sewing projects that are all in various stages of completion. Quilters usually call them WIPs (works in progress) or UFOs (unfinished objects). The projects below aren't all of them, but they're at the top of my To Do list and I'm hoping to finish them within the next couple of months. After these are complete, maybe I'll do another post with a second batch of WIPs!

Lucy Boston Quilt

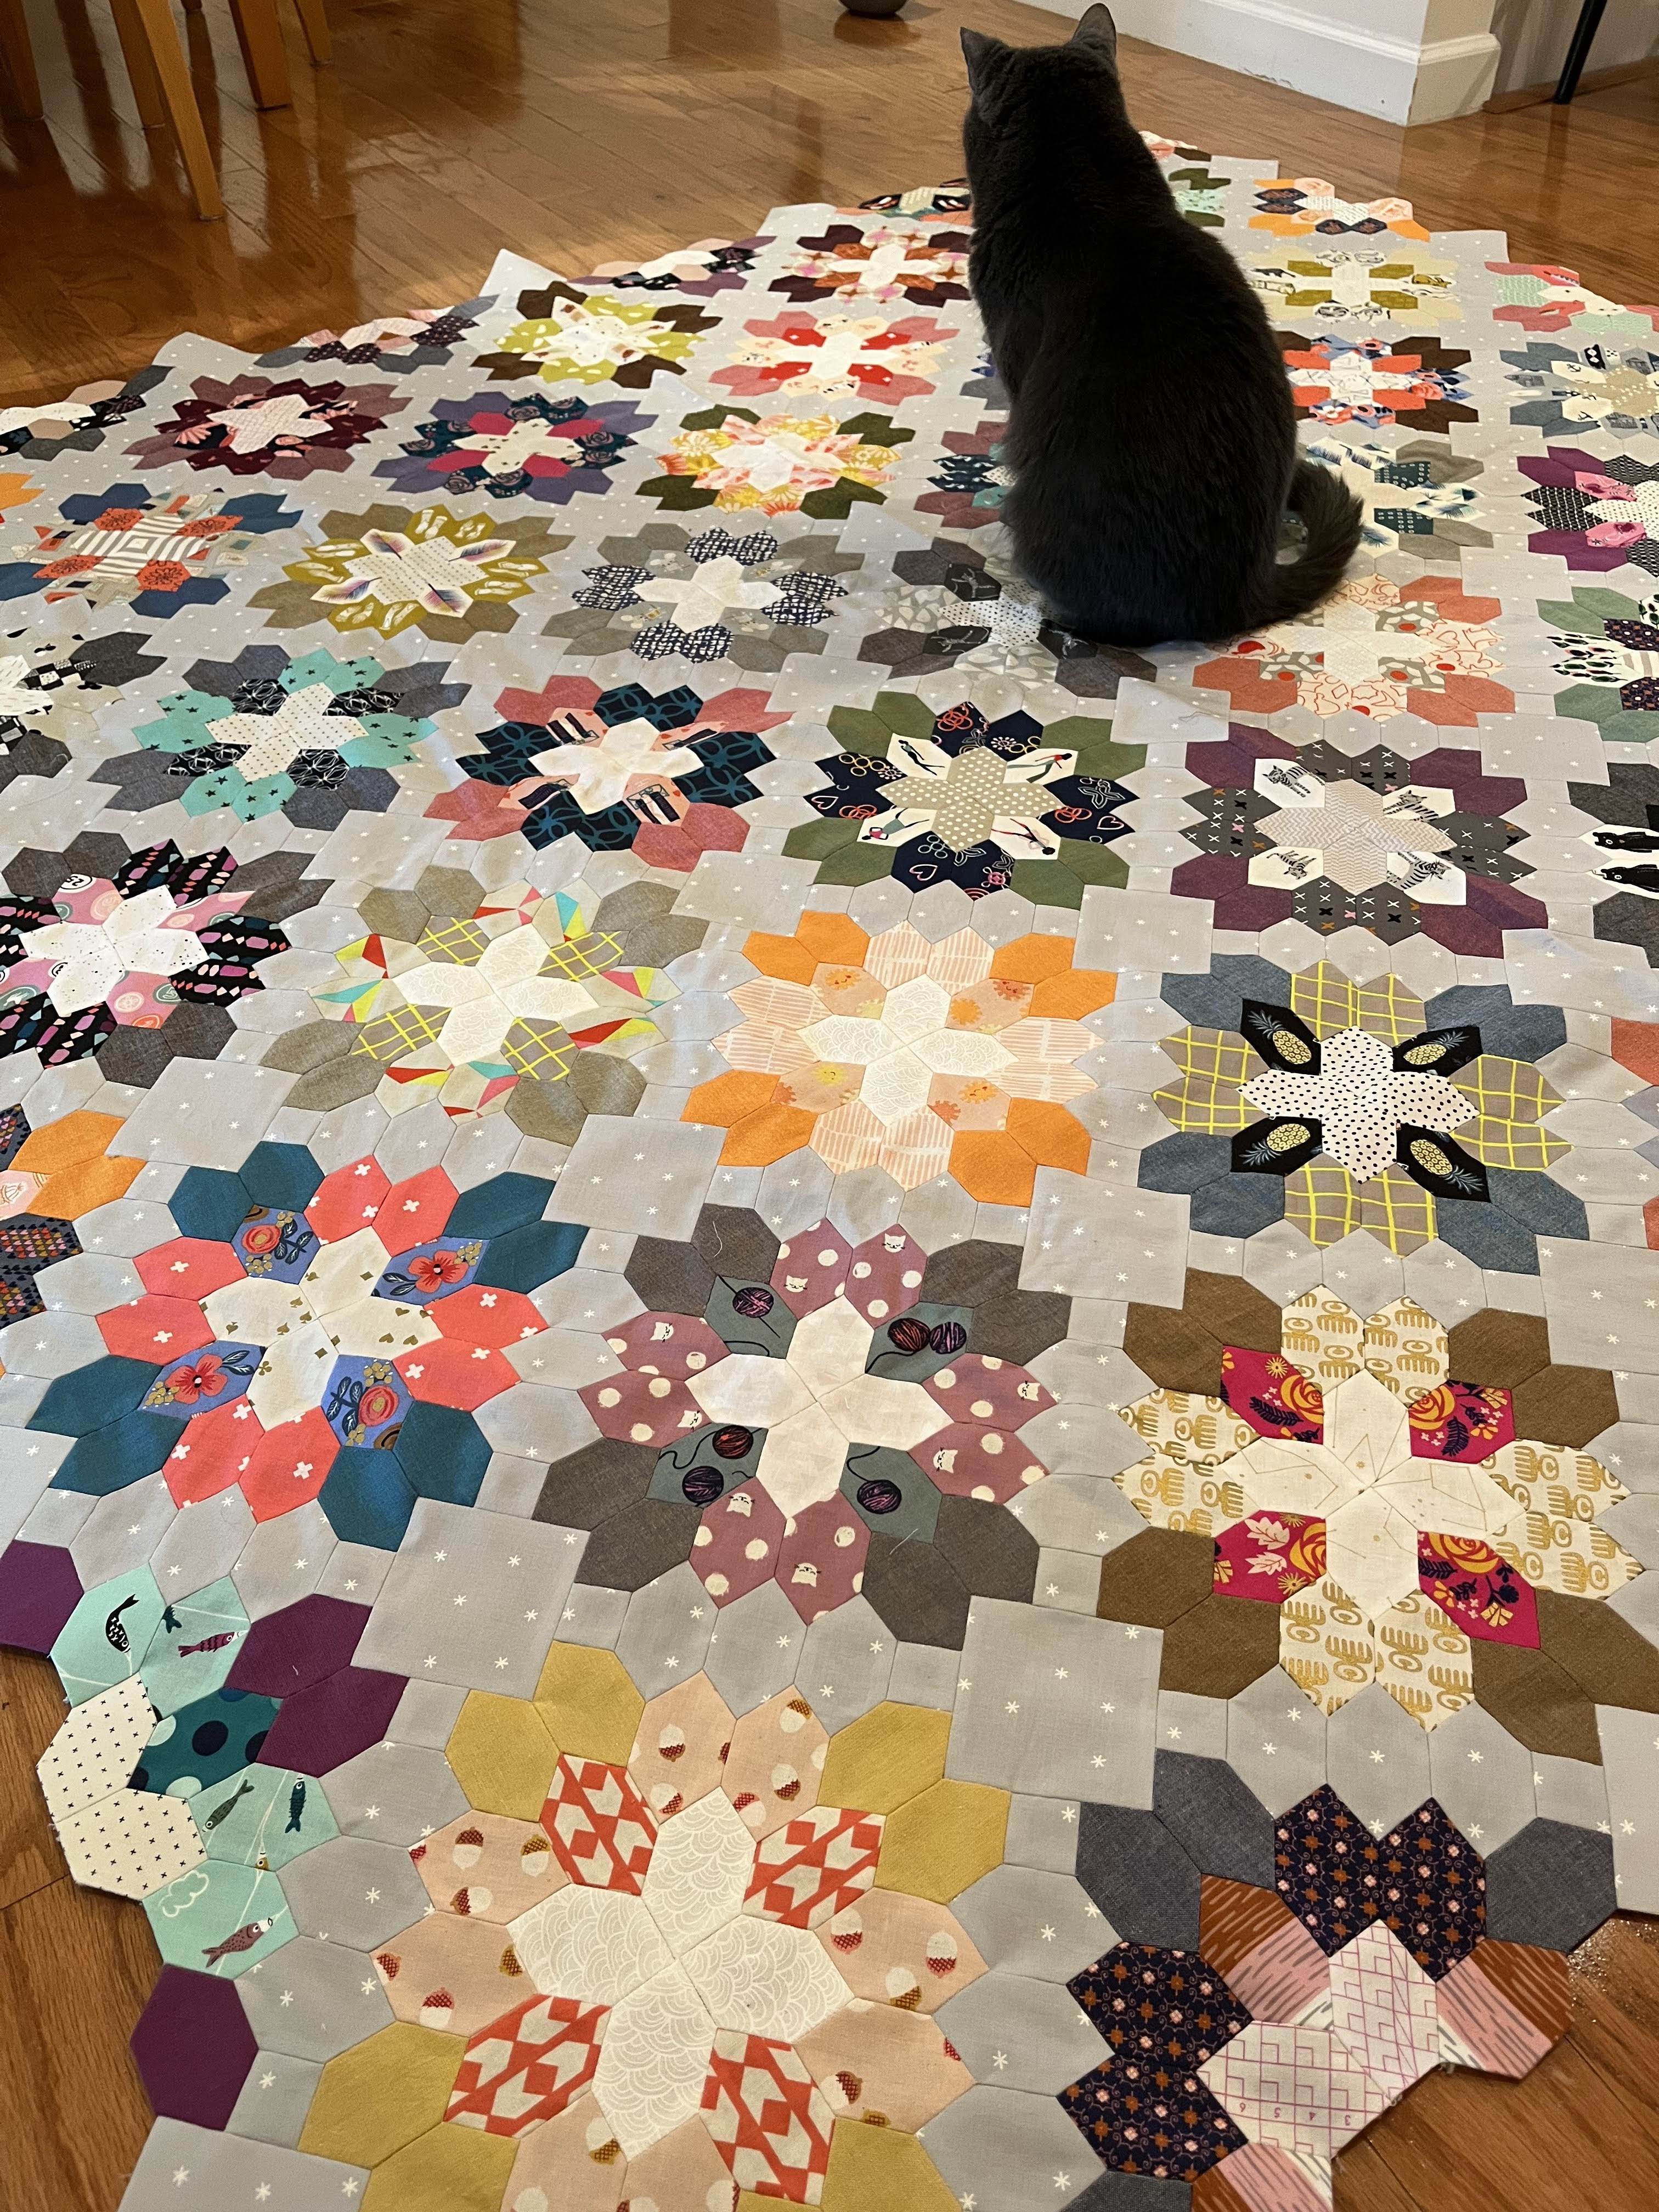
This isn't my oldest WIP, but it's definitely my favorite. It's English paper pieced and all sewn by hand. I started it in 2017 with a little kit I threw together to take with me to Dallas to visit my friend Eryn, her family and her twin newborns. Those kiddos are in school now! And my quilt is pretty close to being finished! I just need to choose a backing and quilting plan. I can't decide if I should hand quilt it -- given that it's hand pieced, do it matter to me to be able to say it's 100% hand sewn? -- or if I'd be happier with an allover longarm quilting design (and a faster finish). If I hand quilt it, I have no idea what design to use...


Fishing Net Quilt

I made this one with the intention of submitting it to my guild's quilt show in March of next year. The large scale and graphic use of color fit the modern quilt aesthetic. Bonus - it was really quick to make. The pattern is from Suzy Quilts, and I made the baby size using fabric from my stash. It's basted and just needs quilted and bound. I'll be hand quilting it using big stitches and color-matched perle cotton thread.


Solstice Roses Mini Quilt

Last year I bought a couple clearance kits from Quilty Box (RIP), and I decided to make this EPP design from Paper Pieces and Sally Kelly first. The kit came with EPP papers, an acrylic diamond template, a pack of charm squares in Sally's Soltice prints plus some solids and thread (although using my standard EPP thread for the project). I only had one issue with the fabric and had to purchase one more print to finish the piecing -- the caramel brown one by Kathy Doughty. After I get all the large hexagons in place, I'll decide what to use as the background, as the pieced element gets appliqued onto a background for finishing. (The kit minus fabric is still available here.)


Neitherlands Quilt

In 2019, my mom and I attended QuiltCon in Nashville and took the Mystery Quilt Workshop with Jen Carlton Bailly (aka @bettycrockerass). We got copies of two of Jen's new patterns at the time, Find Your Fade and Neitherlands, a big set of curvy templates in various sizes, and the choice of patterns to work on in the workshop. We both decided to make a Neitherlands block, and I finished one during our time with Jen. I made one more block when I returned home, but then I packed the project away and put it on a shelf ... until last month. I pulled the project box out again, grabbed some fabric, miscut that fabric as I knew I would (the templates and pattern are a little tricky to sort out when you haven't worked on it in a while) and then found my groove. I made 4 blocks and plan to make 3 more for a 60 x 60" quilt. Needless to say, I'm feeling pretty confident about sewing curves these days.

LinkWithin

Related Posts Plugin for WordPress, Blogger...